Installing Printer Options
9.8
3
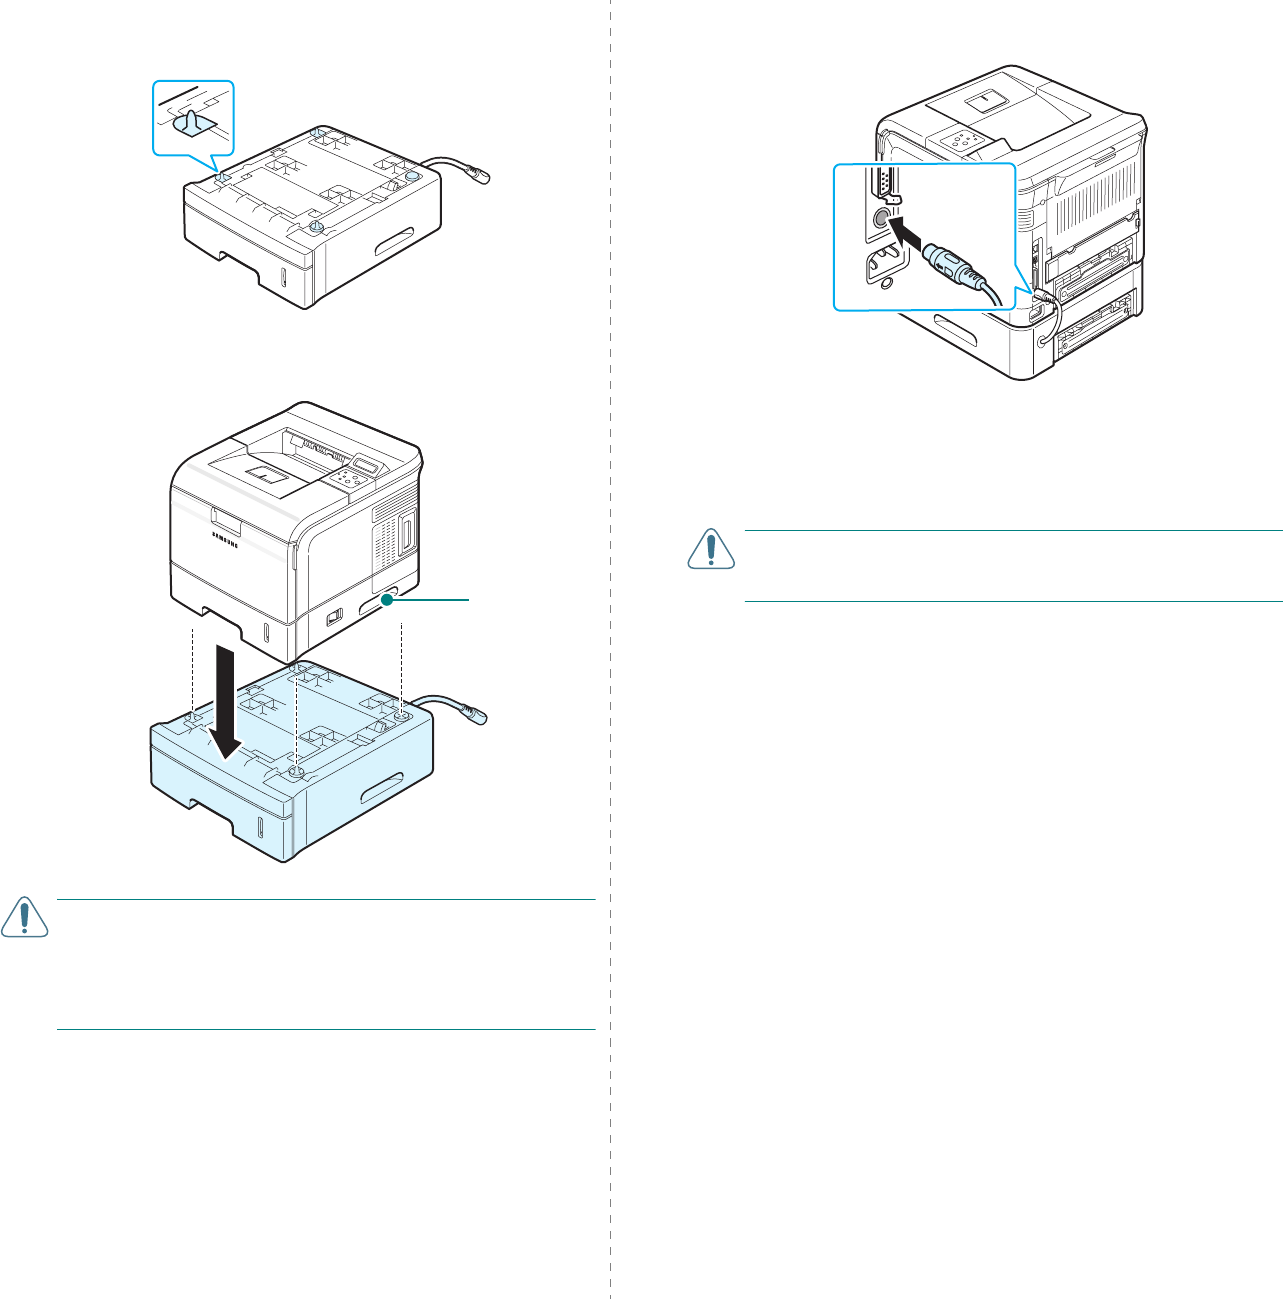
Find the location of the connector and the optional Tray 2
positioners.
4
Place the printer over the optional Tray 2, aligning the feet
on the printer with the positioners on the optional Tray 2.
C
AUTION
: The printer weights 23kg including the toner
cartridge and the tray. Use safe lifting and handling
techniques. If you need to move the printer, it should be
moved by two people. Use the lifting handles as shown in
page 1.3. Back injury could result if a single person attempts
to lift the printer.
Lifting handles
are located at
the lower edge
of both sides of
the printer.
5
Plug the optional Tray 2 cable into the optional Tray 2 cable
connector on the back of the printer.
6
Load paper in the optional Tray 2. The instructions for
loading paper in the optional Tray 2 are same as for
loading in the Tray 1. See page 2.4.
7
Reconnect the power cord and cables and then turn the
printer on.
C
AUTION
:
Do not remove the Tray 1 from the printer while you
are printing using the optional Tray 2. If you do this, a paper jam
may occur. Use the optional Tray 2 with the Tray 1.
After installing optional Tray 2, you must set the tray as
installed in the printer properties window.
8
Click the Windows
Start
menu.
9
For Windows 9x/Me/NT4.0/2000, select
Settings
and then
Printers
.
For Windows XP/2003, select
Printers and Faxes
.
10
Select the
Samsung
ML-3560 Series
PCL 6
printer icon
or
Samsung
ML-3560 Series
PS
printer icon.
11
Right-click on the printer icon and select
Properties
.
12
In PCL 6 Properties, click the
Printer
. Then select
Tray 2
from the
Optional Tray
drop-down list.
In PS Properties, click the
Device Option
tab and select
Installed
from the
Tray 2
drop-down list.
13
Click
OK
.


