


Section 4. Cleaning and Maintenance
Page 4-4 PN 9001105 Rev. A SATO M-84PRO
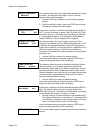
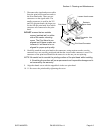
3. Open the Print Head by pushing the Head Latch toward the rear of the printer. The Print
Head is spring-loaded and will automatically open as the Head Latch is disengaged.
4. Remove the ribbon.
5. Apply SATO Thermal Print Head Cleaner to a cotton swab.
6. Carefully insert the swab between the top and bottom portions of the Sensor Assembly.
The location of the sensors is identified by two marks on the assembly.
7. Move the swab back and forth to clean any residue from the sensors.
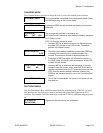
REPLACING THE PRINT HEAD
The print head on the M-84PRO printers is a user-replaceable item. If it becomes damaged for
any reason, it can be easily removed and replaced. Contact your local SATO representative for
information on obtaining a new print head. The M-84PRO is available with three different
print heads with 203, 305 or 609 dpi.Make sure you have the correct replacement head as the
printer will automatically detect the pring head resolution and load the operating parameters
for that head.
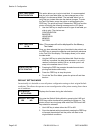
Supplies needed: Flat blade screwdriver
Replacement Print Head
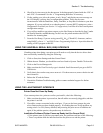
1. Turn the printer off and remove the power cable.
2. Open the Top and Side Access doors.
3. Open the Print Head by pushing the Head Latch toward the rear of the printer. The Print
Head is spring-loaded and will automatically open as soon as the Head Latch is
disengaged.
4. Remove the ribbon from the Ribbon Rewind Spindle if necessary.
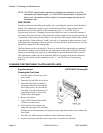
5. View the Print Head from the front of the printer. Locate the center mounting thumb screw
on the top of the assembly. Unscrew this screw. It remains captive and will not come out
of the top attachment plate.
6. The Print Head should now be loosened from the top of the assembly by grasping either
side and carefully pulling it down.