Key Operator Settings
206
7
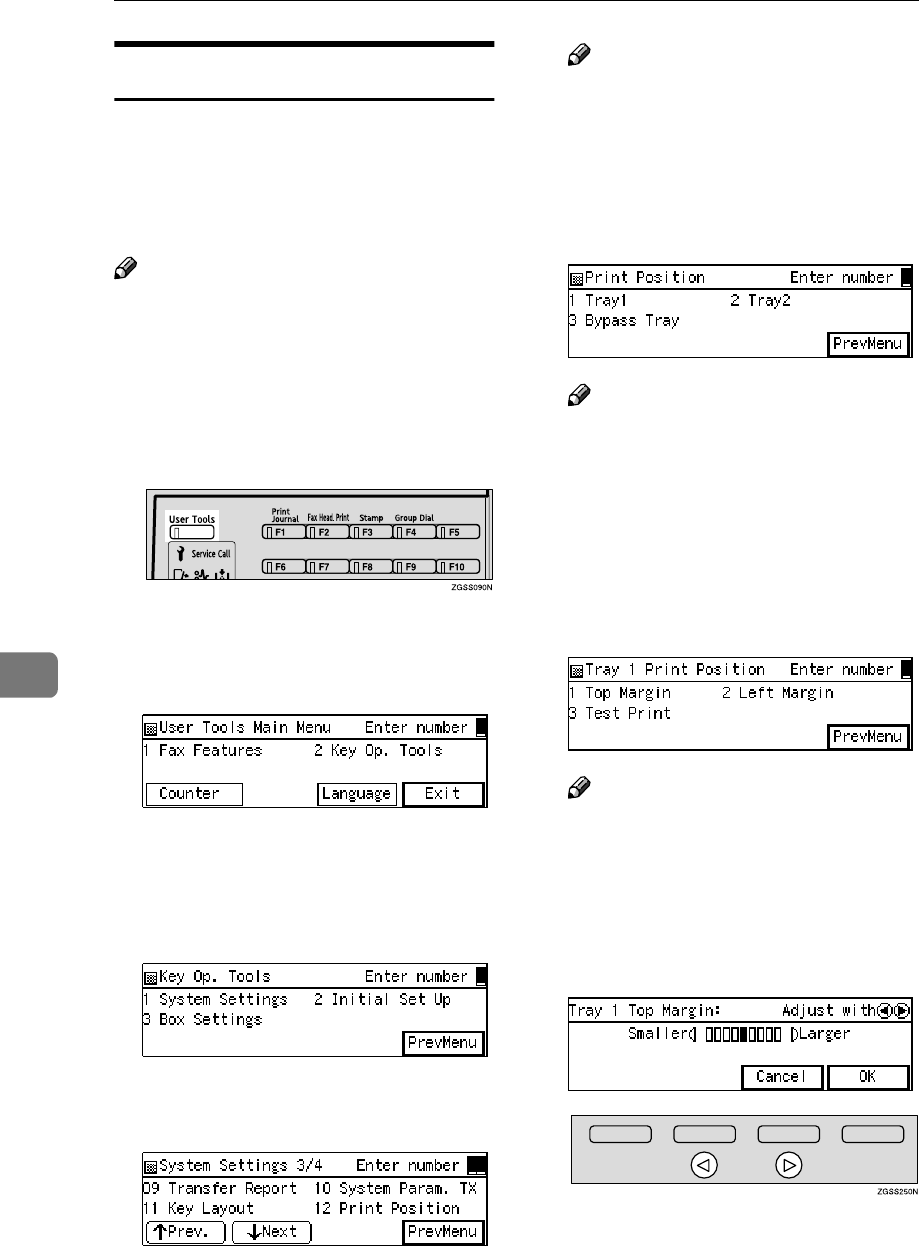
Print Position
If image positioning needs to be ad-
justed slightly, adjust the margins for
the appropriate tray (the main paper
tray, the optional Paper Tray Units, or
the optional Bypass Tray Unit).
Note
❒ You can adjust the top and left
margins of paper in 9 increments.
❒ You can adjust the position of the
printed image in 0.5mm (0.02 in.)
increments.
A
AA
A
Press the {
{{
{User Tools}
}}
} key.
B
BB
B
Enter the code for "Key Op.
Tools" with the number keys.
Then press the {
{{
{q
qq
q}
}}
} key.
The "Key Op. Tools" main menu
appears.
C
CC
C
Enter the code for "System Set-
tings" with the number keys.
D
DD
D
Enter the code for "Print Position"
with the number keys.
Note
❒ If "Print Position" is not dis-
played, press [↑
↑↑
↑Prev.] or [↓
↓↓
↓Next]
until it is.
E
EE
E
Enter the code for the tray you
wish to adjust the margins for
with the number keys.
Note
❒ The main paper tray is dis-
played as "Tray1", the optional
Paper Tray Units as "Tray2–5",
and the optional Bypass Tray
Unit as "Bypass Tray".
F
FF
F
Enter the code for the margin you
wish to adjust with the number
keys.
Note
❒ You can view the margins by
entering the code for "Test
Print", then pressing the {
{{
{Start}
}}
}
key.
G
GG
G
Press 0
00
0 or 1
11
1 key to adjust the
margin.
