


31
Chapter 2 Installation
8
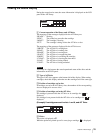
When [[ENTER] to activate]
appears, press the [ENTER] button.
The display returns to “Network”.
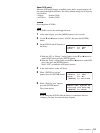
9
When you want to set the IP address, select “3.IP Address”, then press the
[ENTER] button.
• Select “YES” to use the IP address assigned to the DHCP server. Then
proceed to step 12.
• Select “NO” to use the fixed IP address. Then proceed to step 10.
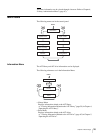
10
When the “IP” setting flashes, use the V button, the v button, the [ENTER]
button and the [CANCEL] button to set the IP Address, then press the
[ENTER] button.
11
When the “Mask” setting flashes, use the V button, the v button, the
[ENTER] button and the [CANCEL] button to set the subnet mask, then
press the [ENTER] button.
12
When [[ENTER] to activate]
appears, press the [ENTER] button.
The display returns to “Network”.
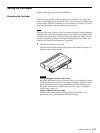
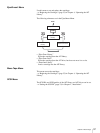
13
When you want to set the default gateway, select “5.Gateway”, then press
the [ENTER] button. (However, the AIT library does not support the
default gateway setting.)
14
When the “Gateway” setting flashes, use the V button, the v button, the
[ENTER] button and the [CANCEL] button to set the IP address for the
default gateway, then press the [ENTER] button.
15
When [[ENTER] to activate]
appears, press the [ENTER] button.
The display returns to “Network”.
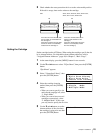
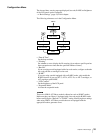
16
When you want to obtain the MAC address, select “6.MAC Information”,
then press the [ENTER] button.
The MAC address is displayed.
17
Press the [CANCEL] button twice to return to the status display.
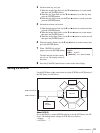
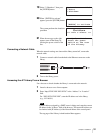
18
Use the V and v buttons to select
“9. System Down”, then press the
[ENTER] button.
Domain
XXX
[ENTER] to activate
DHCP YES
IP 000.000.000.000
Mask 000.000.000.000
[ENTER] to activate
Gateway
000.000.000.000
[ENTER] to activate
MAC Address
00-00-00-00-00-00
Menu 12:34
7.Tape Inventory
8.Password
9.System Down