


53
Chapter 4 Operating the AIT Library
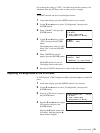
Two or more inserted
cartridges
The element address of the front
slot appears on the first line. The
element address of the next slot
appears on the second line.
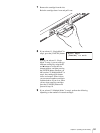
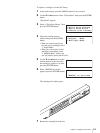
1 Eject the cartridge and press the
[ENTER] button.
2 The slot moves to the next. Eject
the cartridge in the same manner
and press the [ENTER] button.
When you press the [ENTER]
button, the slot moves to the next.
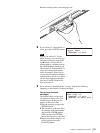
3 Repeat until all the cartridges are
ejected, and then press the
[CANCEL] button.
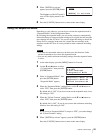
Only one inserted cartridge
The element address of the front
slot appears on the first line.
(Nothing appears on the second
line.)
1 Eject the cartridge and press the
[CANCEL] button.
Caution
Do not put your fingers in the slot
when it is moving, as this could
result in injuries.
10
When “[ENTER] to activate” appears, press the [ENTER] button.
If you selected “1. Single Mode” in
step 4, the display on the right
appears.
If you selected “2. Multiple Mode”
in step 4, the display on the right
appears.
The shutter closes and the
initialization is performed.
Caution
Keep your fingers clear of the
shutter when it closes.
11
When the initialization ends, press the [CANCEL] button three times to
return to the status display.
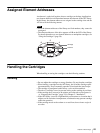
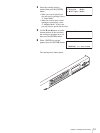
Replacing the Cartridges
When replacing a cartridge, specify the slot using the element address. For
information about element addresses, refer to “Assigned Element Addresses”
(page 48) in Chapter 3, “Basic Usage”.
Eject Tape Slot 01
Next Slot 02
[CANCEL] to exit
[ENTER] to next slot
Eject Tape Slot 01
[CANCEL] to exit
Slot 01
Exit ?
[ENTER] to activate
Eject Tape Slot 01
Exit ?
[ENTER] to activate
Slot 01
Initializing