


I-31
Composing Images with Keys
Chapter 3 Basic Operations
6
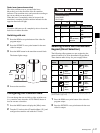
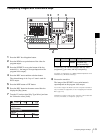
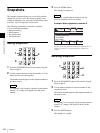
Press the KEY button in the menu control block to
display the [Key] menu.
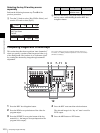
7
Turn the V1 knob to select [Key Type Select], and turn
the V4 knob to select [Chr].
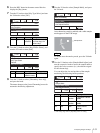
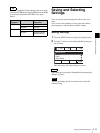
8
Turn the V1 knob to select [Key Fill/Src Select], and
turn the V3 knob to select [Self].
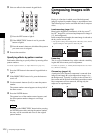
9
Turn the V1 knob to select [Chromakey Auto Adj],
and press the knob.
The menu changes to the [Auto Chromakey] menu for
automatic chroma key adjustment.
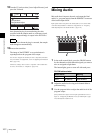
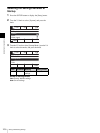
10
Turn the V1 knob to select [Sample Mark], and press
the V4 knob.
Auto chroma key mode is enabled, and a white sample
mark appears in the PVW image.
To disable auto chroma key mode, press the V4 knob
again.
11
Turn the V1 knob to select [Sample Mark Adjust], and
turn the respective knobs to move the sample mark to
specify the color to remove (i.e., the reference signal
for the chroma key).
You can adjust the size and position of the sample
mark using the following knob operations.
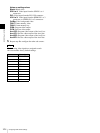
1) The setting range will vary depending on the size setting.
Knob Parameter Meaning Setting values
V4 Type Key type
selection
Lum (luminance key),
Lin (linear key), Chr
(chroma key)
Knob Parameter Meaning Setting values
V3 Source Key source
selection mode
Self, Auto, Split
0001
Rate
30
SS
Mon
PGM
Key
2/27
Select
Type
Chr
Back
Key Transition
Key Type Select
Resizer
0001
Rate
30
SS
Mon
PGM
Key
4/27
Select Source
Fill
Self
Bus
Key Transition
Key Type Select
Resizer
Key Fill/Src Select
Tip
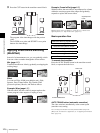
Knob Parameter Meaning Setting values
V2 Pos H Horizontal
position
–100.00 to +100.00
1)
(0.00)
V3 Pos V Vertical
position
–100.00 to +100.00
1)
(0.00)
V4 Size Size
1.00 to 100.00
(25.00)
0001
Rate
30
SS
Mon
PGM
Auto Chromakey
1/3
Select
Mark
Back
Sample Mark
Sample Mark Adjust
Auto Adjust Execute
Enter
Sample mark
0001
Rate
30
SS
Mon
PGM
Auto Chromakey
2/3
Select Pos V
Size
0.00
Back
Sample Mark
Sample Mark Adjust
Auto Adjust Execute
Pos H
0.00
25.00