


20
Connecting the Projector
Chapter 2 Preparations
Connecting the Projector
When you connect the projector, make sure to:
• Turn off all equipment before making any connections.
• Use the proper cables for each connection.
• Insert the cable plugs firmly; loose connections may
increase noise and reduce performance of picture
signals. When pulling out a cable, be sure to pull it out
from the plug, not the cable itself.
• When installing the optional input board, consult your
Sony dealer.
Refer also to the instruction manuals of the equipment to
be connected.
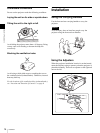
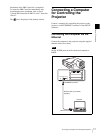
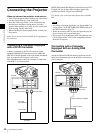
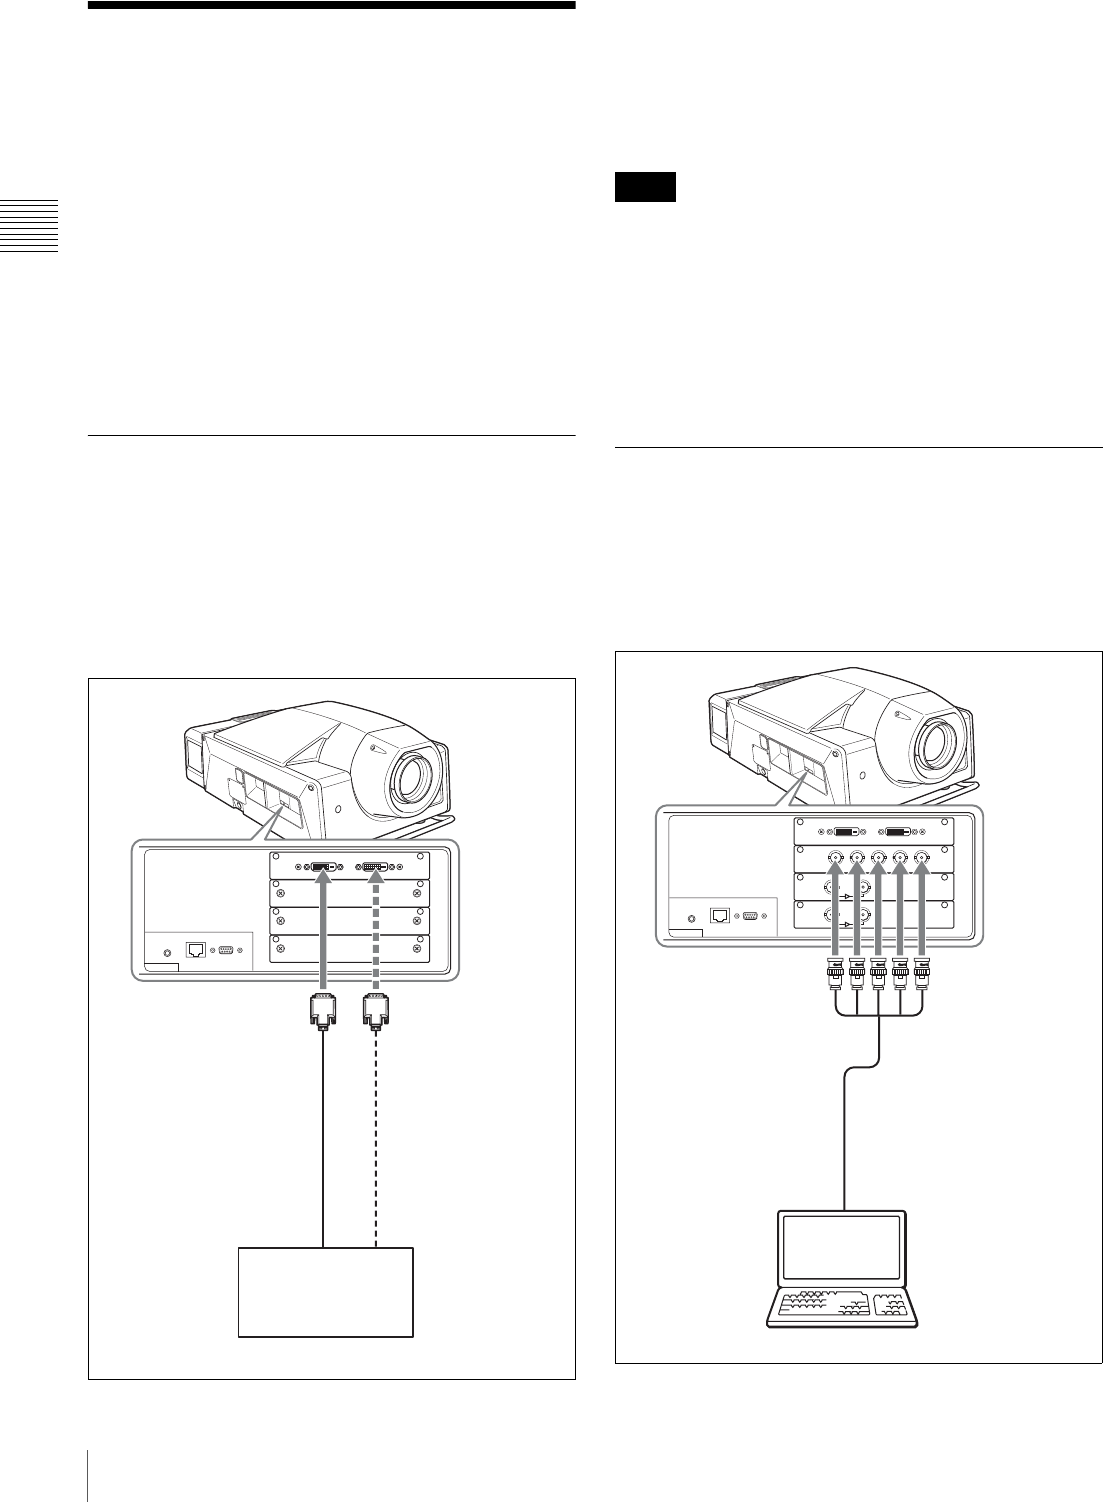
Connecting a Computer Equipped
with a DVI-D Connector
Connect a computer to the DVI-D connector on the
optional LKRI-004 DVI interface board or LKRI-005
HDCP DVI board attached to the input board attachment
part. A progressive DVI signal can be input.
The illustration below shows an example of connection
with INPUT A of the projector.
HDCP (High-bandwidth Digital Content Protection) DVI-
D signal can also be input when the input signal with
specified resolution is input from LKRI-005.
For details, refer to the Operating Instructions of LKRI-
005.
• According to the input signal type, set “Signal Mode” on
“Input Source” in the PICTURE CONTROL window of
the SRX Controller. (page 27)
• When an extension cable is used, the signal may not be
input correctly due to signal reduction.
• If you input 10-bit signals from a DVI-D connector only
(10-bit single mode), a DVI cable compatible with the
Dual-link is required.
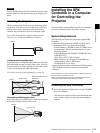
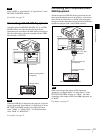
Connecting with a Computer
Equipped with an Analog RGB
Connector
Attach the optional LKRI-001 analog input board to the
input board attachment part on the projector, and connect
with a computer.
INTER LOCK
ETHERNET RS232C
AUXDVI-D
Left side
DVI-D connector AUX connector
DVI cable
(not supplied)
to DVI output
Computer
Notes
R(Pr/Cr)B(Pb/Cb)HD VDG(Y/Y)
IN
INTER LOCK
ETHERNET RS232C
OUT
IN OUT
AUXDVI-D
R/G/B/HD/VD
connectors
Monitor cable (not supplied)
Computer
to monitor output
Left side