


Chapter
3
22
Projecting the Picture
Chapter 3 Projecting
Projecting
Projecting the Picture
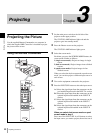
Use the supplied Remote Commander or a computer in
which the supplied SRX Controller is installed to project
the picture on the screen.
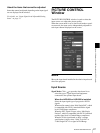
Using the Remote Commander
1
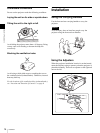
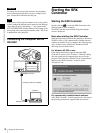
Set the main power switch on the left side of the
projector to the upper position.
The STATUS LAMP indicator lights red and the
projector goes into standby mode.
2
Press the ? button to turn on the projector.
The STATUS LAMP indicator lights green.
3
Select the screen mode.
Each time you press the SCREEN MODE button, the
screen mode switches as follows:
1 (single-screen mode): Projects an image in single
screen.
2 (dual-screen mode): Projects images in two divided
screens.
4 (quad-screen mode): Projects images in four
divided screens.
When you select the dual-screen mode or quad-screen
mode, you can also project a different input source in
each screen.
4
Turn on the equipment connected to the projector.
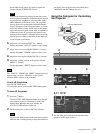
5
Press the INPUT SEL button to select the input source.
A: Selects the signal input from the connectors on the
pre-installed input board in the INPUT A section.
B: Selects the signal input from the connectors on the
optional input board installed in the INPUT B
section.
C: Selects the signal input from the connectors on the
optional input board installed in the INPUT C
section.
D: Selects the signal input from the connectors on the
optional input board installed in the INPUT D
section.
When you select dual-screen mode or quad-
screen mode in step 3
Press one of the INPUT SEL A to D buttons to select
the input source you want to project, then select one of
SR Projector
RM-PJ4K
IR
I
1
SCREEN
MODE
1 2 4
MUTING
FUNCTION
INPUT SEL
A
1
123
2
34
BCD
PICTURE CONT
BRIGHTCONTR
+
–
+
–
+
–
+
–
+
–
+
–
SHARP
ZOOMFOCUS SHIFT
SCREEN SEL
LENS CONT
2
3
5
1
7
9
6, 8
MUTING
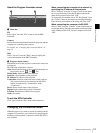
1
STATUS LAMP indicator