


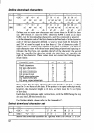
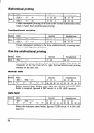


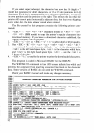
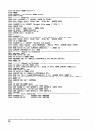
The normal character height is 24 cells, and the width is varied by the
character mode as shown below.
Character mode
Character width
Draft characters
9
LQ pica characters 29
LQ elite characters
23
LQ semi-condensed
LQ proportional
::
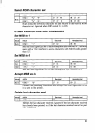
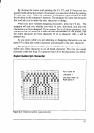
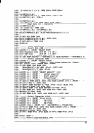
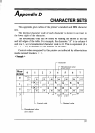
Figure C-l shows the matrix with the telephone symbol filled in. Note
ihat there are no pairs of horizontally adjacent dots. The pins in the print
head cannot fire fast enough to print adjacent dots in the horizontal direction.
To the printer, a normal character is represented three bytes for each
column. If you are working by hand, you can calculate the data as shown
in Figure C-l and enter them via the < ESC > “8~” < 0 > printer command.
If you use the program in this appendix, proceed as follows.
The program starts by asking whether you want to read characters from
an existing file. If you are going to add the telephone symbol to a file of
download characters you have already generated, answer yes; if you are
going to create a new file, answer no. The arrow on the screen toggles between
Yes and No when any key except Return is pressed. The Return key enters
your choice.
In the same way the program asks you to select Standard or IBM mode;
normal or super/subscript, and character mode, then to confirm whether
to continue or start over. Continuing, on the next screen the program asks
what character you want to redefine, offering the exclamation mark(!) as
a suggestion. If you want to print the telephone symbol in place of the ex-
clamation mark, press Return. If you want to assign the telephone symbol
to another character, press the key of that character.
Next you must choose the spaces between characters. After you have
defined the character width and left space, the cursor enters the character
box. You can move the cursor with the numeric keypad. For example,
pressing the “6” key moves to the right; pressing the “3” key moves diagonally
down to the right. The function keys control the setting and clearing of dots.
After Fl is pressed the cursor clears the dot in each position it is moved
to. F3 causes the cursor to set dots. F2 allows the cursor to pass over dots
without either setting or clearing them.
Each dot is represented by two adjacent solid blocks, occupying its own
position and the position to the right. This reflects the fact that the printer
cannot print horizontally adjacent dots. The program automatically censors
adjacent dots.