


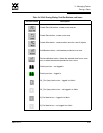


3 – Managing Fabrics
Zoning a Fabric
59097-01 A 3-53
0
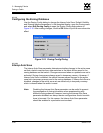
3.7.5.1
Creating a Zone in a Zone Set
When a zone is created, its zone type is soft. To change the zone type to a hard
zone, refer to ”Changing Zone Types” on page 3-56 for more information. Refer to
”Zones” on page 3-39 for information on zone types (soft and hard). To create a
zone in a zone set, do the following:
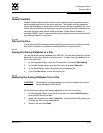
1. Open the Zoning menu, and select Edit Zoning to open the Edit Zoning
dialog.
2. Select a zone set.
3. Open the Edit menu and select Create a Zone.
4. In the Create a Zone dialog, enter a name for the new zone, and click the
OK button. The new zone name is displayed in the Zone Sets dialog. A zone
name must begin with a letter and be no longer than 64 characters. Valid
characters are 0-9, A-Z, a-z, _, ^, $, and -.
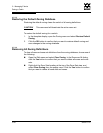
5. To add switch ports or attached devices to the zone, do one of the following:
In the zone set tree, select the zone set. In the graphic window, select
the port to add to the zone. Open the Edit menu and select Add
Members.
Select a port by port number, Fibre Channel address, or World Wide
Name in the Port/Device tree, and drag it into the zone.
Select a port by port number, Fibre Channel address, or World Wide
Name in the Port/Device tree. Right-click the zone and select Add
Zone Members from the popup menu.
6. Click the Apply button to save changes to the zoning database.
Note: If you enter the name of a zone that already exists in the
database, the SANsurfer Switch Manager application will ask if
you would like to add that zone and its membership to the zone
set.