Designing an Interface Between a P6434 Probe and a SUT
12
P6434 Probe Instructions
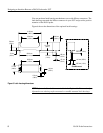
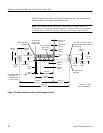
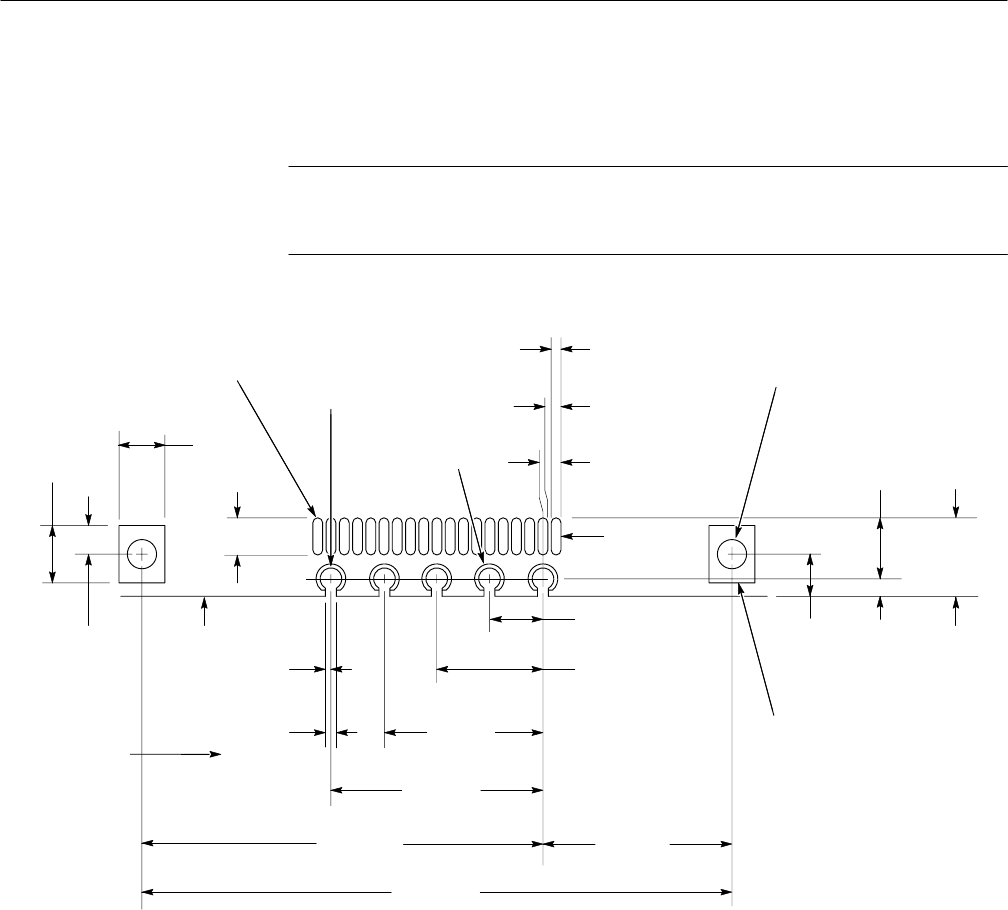
Figure 10 shows the positions and spacing between the pins and latch housing
mounting holes of a straddle-mounted connector.
NOTE. The straddle-mounted connector does not have a keyhole. Be sure to
position pin 1 correctly when building the SUT to maintain the correct mapping
of signals from your SUT to the logic analyzer probe sections and channels.
9.02 mm
(.355 in)
28.20 mm
(1.110 in)
19.18 mm
(.755 in)
10.16 mm
(.400 in)
7.62 mm
(.300 in)
5.08 mm
(.200 in)
2.54 mm
(.100 in)
2.92 mm
(.115 in)
.81 mm
(.032 in)
0.85 mm
(.0335 in)
18X 0.64 mm
(.025 in)
19X 0.43 mm
(.017 in)
2.28 mm
(.090 in)
1.78 mm (.070 in)
2.80 mm
(.110 in)
1.40 mm
(.055 in)
.56 mm
(.022 in)
.28 mm
(.011 in)
2.16 mm
(.085 in)
2X 1.35 mm dia. (.053" .003 in)
Plated through mounting holes for
latch housing
5X 1.40 mm dia.
(.055 in) Pad
both sides
5X .99 mm dia.
(.039" .003)
Plated through
2X Solder pads
both sides
3.73 mm
(.147 in)
Pin 1
Board edge
19X Contact pads
both sides
Note: Original AMP
dimension (.012)
enlarged to allow
for hand insertion
$ .076 mm ($ .003 in)
tolerance all locations
Figure 10: Straddle-mounted connector layout (component side)


