


170 Printing Guide — Installing Client Software for Macintosh
Copying the PPD file to Mac OS 8.6 or 9.x
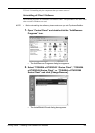
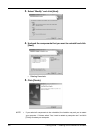
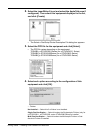
1. Insert the Client1 CD-ROM into the CD-ROM drive and open
your language folder in the “MacPPD” folder.
2. Copy the Stufflt file (.sit) to the desktop, and extract the Mac-
intosh PPD file.
• The Stufflt file varies depending on the equipment.
TOSHIBA_e-STUDIO4511Series.sit (for e-STUDIO4511 Series)
TOSHIBA_e-STUDIO450Series.sit (for e-STUDIO450 Series)
TOSHIBA_e-STUDIO280Series.sit (for e-STUDIO280 Series)
NOTE: • To extract the file, the Stufflt utility must be installed on your computer. For instruc-
tions on how to extract the file, refer to your StuffIt documentation.
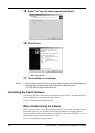
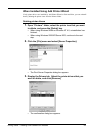
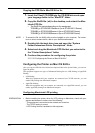
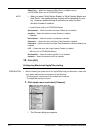
3. Double-click the boot drive icon and open the “System
Folder:Extensions:Printer Descriptions” folder.
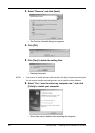
4. Select and drag the Macintosh PPD file that you extracted to
the “Printer Descriptions” folder.
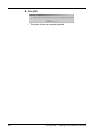
5. Continue the procedure for configuring the printer.
P.170 "Configuring the Printer on Mac OS 8.6/9.x"
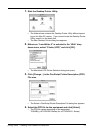
Configuring the Printer on Mac OS 8.6/9.x
After you copy the PPD file to the Printer Descriptions folder in the System Folder, you can con-
figure the printer.
This equipment supports two types of Macintosh Printing Service: LPR Printing or AppleTalk
Printing.
• LPR Printing
When this equipment and your computer are connected over TCP/IP network, you can
enable LPR printing from Macintosh computer.
• AppleTalk Printing
When this equipment and your computer are connected over AppleTalk network, you can
enable AppleTalk printing from Macintosh computer.
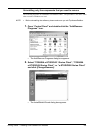
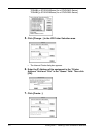
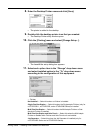
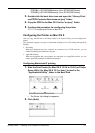
Configuring Macintosh LPR printing
PREPARATION: • Before installing the printer driver for LPR printing on Macintosh, check with your
system administrator to make sure of the following:
- This equipment is connected to the network and turned on.
- The TCP/IP setting is correct.
- LPD Printing Service is enabled on this equipment.