Setup
13
Connection Type Details ISP Data required
Dynamic
IP Address
Your IP Address is allocated
automatically, when you con-
nect to you ISP.
Often, none.
Some ISP's may require you to
use a particular Hostname or
Domain name, or MAC (physical)
address.
Static (Fixed)
IP Address
Your ISP allocates a permanent
IP Address to you.
Usually, the connection is
"Always on".
IP Address allocated to you, and
related information, such as
Network Mask, Gateway IP
address, and DNS address.
PPPoE, PPPoA, You connect to the ISP only
when required. The IP address
is usually allocated automati-
cally.
a) User name and password are
always required.
b) If using a Static (Fixed) IP
address, you need the IP address
and related information (Network
Mask, Gateway IP address, and
DNS address)
IPoA
(IP over ATM)
Normally, the connection is
"Always on".
IP Address allocated to you, and
related information, such as
Network Mask, Gateway IP
address, and DNS address.
BPA BPA is mainly used in Austra-
lia.
• Server IP Address.
• User name and password.
• Big Pond Server IP address
5. Step through the Wizard until finished.
6. On the final screen of the Wizard, run the test and check that an Internet connection can be
established.
7. If the connection test fails:
• Check all connections, and the front panel LEDs.
• Check that you have entered all data correctly.
Configuring VC2, VC3 and VC4
The Broadband ADSL Router supports multiple VCs (Virtual Circuits) on the ADSL connec-
tion.
VC1 must be used for general-purpose Internet access. The other VCs (VC2, VC3 and VC4)
are available for special purposes, such as Video-on-Demand.
You can only use these VCs if supported by your ISP and ADSL service provider. In that case,
they will provide the necessary configuration data.
Some ISP's allow multiple PPPoE connections. This allows
multiple PCs to connect to the Internet using PPPoE client
software. When using the Broadband ADSL Router, multiple
Broadband ADSL Router User Guide
14
PPPoE connections are neither necessary nor supported.
To Configure additional VCs
1. Start the Setup Wizard again.
2. On the first screen, select VC2, and click "Next"
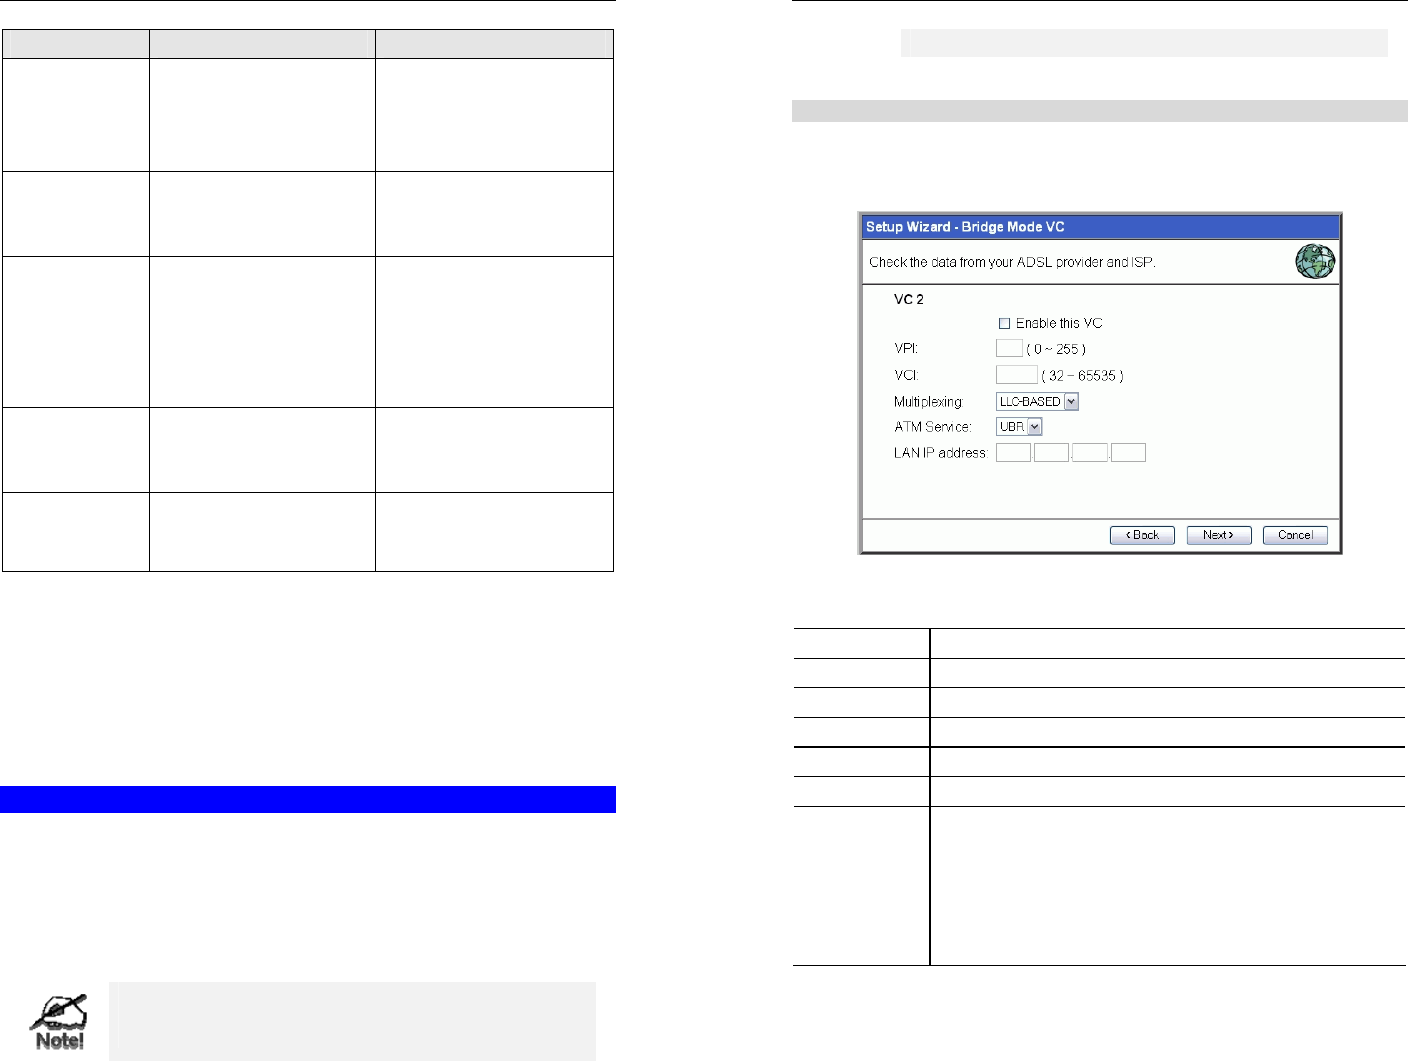
3. Configure the VC setup screen as described below, then click "Next".
Figure 8: Setup Wizard - VC2
Setup Wizard VC Screen
VC
The VC number is displayed (VC2, VC3, or VC4)
Enable
To use this VC, you must enable it by checking this checkbox.
VPI
Enter the VPI value provided by your ISP.
VCI
Enter the VPI value provided by your ISP.
Multiplexing
Select the multiplexing value provided by your ISP.
ATM Service
Select the multiplexing value provided by your ISP.
IP Address
Enter the IP address of the device on your LAN which will receive the
data on this VC.
• For Video-on-Demand, this would be the IP address of your
SetTop Box.
• For VoIP, this would be the IP address of your VoIP TA.
• Note that this IP address does not have to be in the same IP ad-
dress range as other devices on your local LAN.
4. When finished, click "Next" and complete the Wizard.
5. After completing the Wizard, you can check the Status screen to see the VC has been
corrected established.
