


16
Index
Contents
16
Index
Contents
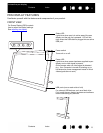
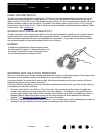
Interactive pen display
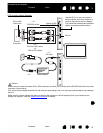
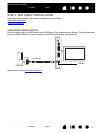
8. As necessary, configure the display control panel settings for the proper size and color resolution.
See the product specifications
for details about the maximum (native) resolution and other resolution
sizes that can be used with your pen display. The display size and color resolution may be constrained
by the capabilities of your video card.
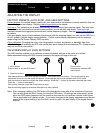
Windows
: If you are using the pen display as a secondary display, you may first need to enable the unit
in your display properties control panel.
To fine-tune the display, see adjusting the display
. If using analog (VGA) mode, see also adjusting pitch
and phase (VGA only).
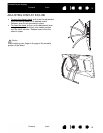
9. After the LCD monitor portion of the installation is working to your satisfaction, move on to step 2: pen
tablet installation.
For troubleshooting tips, see troubleshooting
.
Notes:
Each interactive pen display LCD panel is produced under very stringent quality standards.
Production techniques cannot guarantee an absolutely perfect display, and some panels may exhibit
a certain number of pixels that show an incorrect color. See the product specifications
for more
information.
If an image has fine striping (such as screen stripes), it may appear to flicker or display a moiré
pattern.
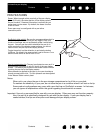
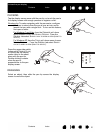
Do not apply excessive pressure on the display screen surface, it may cause the appearance of a
moiré or pooling pattern. If this occurs, use less pressure on the display screen when working with
the pen.
When a still image is displayed for a long period of time, an after-image may remain for a short time.
To prevent this, use a screen saver or other power management feature.
To extend the life of the pen display backlight, set your computer’s power management to turn off
the display when it is not in use for extended periods of time.