Installation and Configuration
2–10 TM-XR9B-01XN
Basic Setup Procedure - Ethernet
This procedure can be used as a quick reference for those familiar with
the configuration requirements for the Ethernet/RS-232 Interface as
installed in the DC power supply. For those who want more information,
each step refers to more detailed procedures located in subsequent
sections. Execute each step of the procedure in the sequence given.
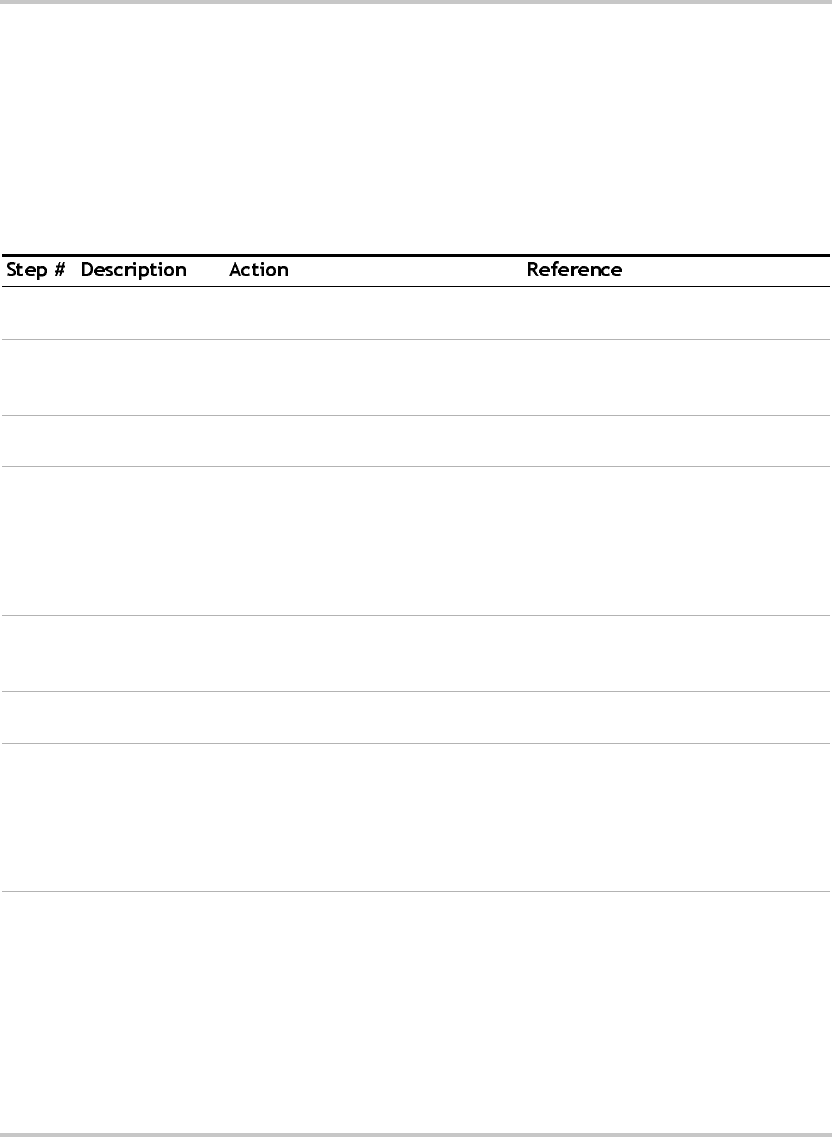
Table 2-3
Ethernet Setup Procedure
1 Mode
Configuration
Configure for Ethernet
communications.
See “Configuring for Ethernet or RS-
232” on page 2–12.
2 Ethernet
Connection
Connect the CAT 5 network cable to
the Ethernet connector on the
supply.
See “Ethernet Connection” on
page 2–13.
3 User Signal
Connector
Configure and use the user line
connector signals, if required.
See “User Lines Connector” on
page 2–26.
4 Power ON Power on the unit and wait 45
seconds for the Ethernet Bridge to
complete its start-up routine. Before
proceeding, check to ensure that the
green NETwork LED on the back
panel is ON.
See “Troubleshooting” on page 3–20
if the NETwork LED does not stay
illuminated after startup has
completed.
5 Locate your
power supply on
your network
Load the Setup Software that ships
with this interface card.
See “Locating the Power Supply on
Your Network” on page 2–14.
6 Configure the
Ethernet Bridge
Access the device’s web server/
configuration page.
See “Configuring Ethernet Bridge”
on page 2–15.
7 Test Begin Communicating with your
instrument.
If you do not have a TCP/IP based
software application suitable for this
application, and are familiar with RS-
232 type communications, see
“Installing and Using RealPort®” on
page 2–16.
TM-XR9B-01XN.book Page 10 Monday, April 19, 2004 9:00 AM


