Installation and Setup
Xerox
®
WorkCentre
®
6605 Color Multifunction Printer 101
User Guide
Importing a Digital Certificate
Before importing a certificate, back up the certificate file.
Note: Use Internet Explorer to import the certificate from Windows. Use Safari to import certificates
from Macintosh.
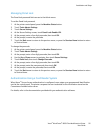
To import a digital certificate:
1. At your computer, open a Web browser, in the address field, type the IP address of the printer, then
press Enter or Return.
2. Click Properties.
3. In the left navigation panel, scroll to Security, then select SSL.
4. Click Upload Signed Certificate.
Note: Upload Signed Certificate appears only when the optional hard drive is installed and the HDD
Data Encryption is enabled.
5. Enter a password corresponding to the certificate file to import.
Note: A password is only required for PKCS#12 certificates. Leave the password field blank for
PKCS#7 and other certificates.
6. To confirm, re-enter the password.
7. Click the Browse button, then browse to the certificate file and select it.
8. To import the file, click Import.
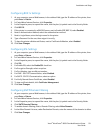
Configuring the Digital Certificate Purpose
1. At your computer, open a Web browser, in the address field, type the IP address of the printer, then
press Enter or Return.
2. Click Properties.
3. In the left navigation panel, scroll to Security, then select Certificate Management.
Note: Certificate Management appears in the Security menu only when the optional hard drive is
installed and HDD Data Encryption is enabled.
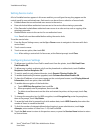
4. Next to Category, select an option:
− When setting a certificate for an SSL server, SSL client, IPsec, or Wireless LAN client, select
Local Device.
− When setting a certificate for a Wireless LAN server, select Trusted Certificate Authority.
5. Next to Certificate Purpose, select an option.
6. Next to Certificate Order, select the order in which the certificates appear.
7. To display the Certificate List page, click Display the List.
Note: If the list includes more than 20 certificates, click Next to display the next page.
8. Select the certificate to associate with the Certificate Purpose you selected in step 5.
9. To display the Certificate Details page, click Certificate Details.
10. After confirming the certificate details, at the top of the details window, click the Use this
certificate button.


