


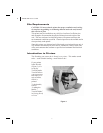
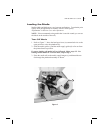

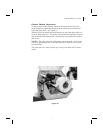

8. To hold the media against the spindle, place the hold down hook over
the backing and insert both ends into the small slots in the round plate at
the far end of the spindle. Again, rotate the backing rewind spindle
counterclockwise to remove any slack in the backing material.
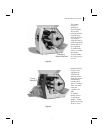
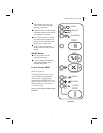
9. Adjust all of the guides:
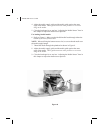
Push the media supply guide inward until it is just touching the outer
side of the media supply roll, then lock the guide in place with its
locking screw. The guide must not cause pressure or excessive drag on
the media supply roll.
Adjust the outer edge guides on both the lower guide rod and the platen
guide rod until they just touch the outer edge of the media and backing
without causing the material to buckle.
Adjust the media guide until it just touches the outer edge of the media
without causing the material to buckle.
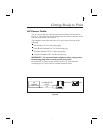
10.See “Adjusting the Media Sensor” later in this chapter to adjust the me-
dia sensor.
NOTE: In the Peel-Off mode, proper media tracking is critical. Refer to
the “Backing Rewind Power Roller Adjustment” in Routine Care and
Adjustments to make sure that the media tracks properly through the
printer.
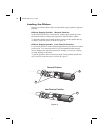
Removing the Label Backing Material
When the amount of backing wound on the backing rewind spindle reaches
full capacity, the backing rewind spindle full sensor activates, the
paper/ribbon light flashes, and printing pauses.
To remove the backing material, follow these steps (you don’t need to
power off the printer for this procedure):
1. Unwind about 24" of backing from the backing rewind spindle and cut it
off at the spindle.
2. Pull out the hold down hook and slide the backing material off of the
spindle and discard.
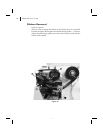
3. Feed the new starting edge of the backing through the mechanism and
attach it to the backing rewind spindle as described in the loading proce-
dure.
NOTE: While holding the media in position against the tear-off/peel-off
plate, open and close the printhead without disturbing the media position.
The printer is now ready to print more labels.
10 S400 & S600 User’s Guide
18