


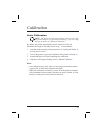


Manual Calibration
A manual calibration should be performed whenever you are using
pre-printed labels (or label backing) or if the printer will not auto calibrate.
1. Turn on the printer power.
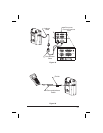
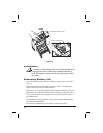
2. Remove 4-6” (102-152 mm) of labels from a section of backing
material. Load the media so that only the backing material is threaded
through the printer and under the printhead.
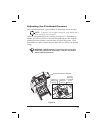
3. Press and hold the Feed button until the Error LED flashes once, then
twice. Release the button.
4. The printer will set the media sensor for the label backing you are
using. After it is done making this adjustment, the roll will
automatically feed until a label is positioned at the printhead.
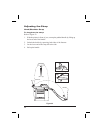
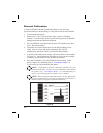
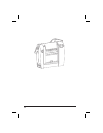
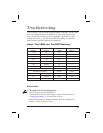
5. A profile of the media sensor settings will print (similar to the example
in Figure 25). Upon completion, the printer will save the new settings
in memory and the printer is ready for normal operation.
6. Press the Feed button. One entire blank label should feed. If this
doesn’thappen,trydefaulting(referto“FeedButtonModes”in
Troubleshooting) and recalibrating the printer.
NOTE: Performing a manual calibration disables the auto
calibration function. To return to auto calibration, either default
theprinter(see“FeedButtonModes”inTroubleshooting)or
refer to your label preparation software user’s manual.
NOTE: When using non-continuous media, set the appropriate
software command (see your label preparation software user’s
manual) before you perform a manual calibration.
28
Figure 25