


36 Wireless-G USB Adapter
c Click OK twice to exit.
That’s it! You have verified your DHCP settings for a Windows
Vista computer in an infrastructure network.
Windows XP
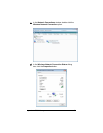
1 Follow these steps to open the Internet Protocol (TCP/IP)
Properties dialog box.
a From the desktop, click the Start button, select Control
Panel, and then click Network Connections.
b Right-click the Wireless Network Connection icon, and
select Properties.
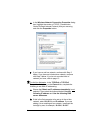
c In the Wireless Network Connection Properties dialog
box, select Internet Protocol (TCP/IP) from the list, and
click the Properties button.
d If you have an ad hoc network, continue with step 2a. If
you have an infrastructure network, continue with step
3a. If you’re not sure what kind of network you have,
refer to page
13.
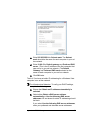
2 For Ad Hoc Networks: Complete the following to set static IP
addressing:
a Ensure that Obtain an IP address automatically is not
selected. Then select the buttons labeled: Use the
following IP address and Use the following DNS
server addresses.
b If this is the first computer to be set up in the ad hoc
network, enter 10.0.0.5 for an IP address. If you are
adding it to an existing ad hoc network, increment the
last digit by one, for example, 10.0.0.6, 10.0.0.7
c Enter 255.255.255.0 for Subnet mask. The Subnet
mask should be the same for each computer in your ad
hoc network.
d Enter 10.0.0.5 for Default gateway and Preferred DNS
server. (This is the IP address of the first computer that
was set up in your ad hoc network.) The Default