


DUA1840-0AAA01
Setting Up the MSH Switch 1005 for Management
1
-
21
Setting Up the MSH Switch 1005 for Management
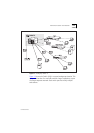
This section describes how to get started if you wish to use an SNMP
manager. It assumes you are already familiar with SNMP management.
■
If you are using IP and you have a BOOTP server setup correctly on your
network, the IP address for the Switch 1005 will be detected
automatically and you can start managing the Switch 1005 without any
further configuration.
■
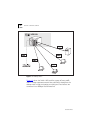
If you are using the IPX protocol, the Switch 1005 will be allocated an
IPX address automatically. You can start the SNMP
Network M
anager
and begin managing the Switch 1005.
■
If you are using IP without a BOOTP server, you will need to enter the IP
address of the Switch 1005 before the SNMP
Network Manager
can
communicate with the device. To do this, perform the following steps:
1
Ensure your MSH Management Module is running v4.2 or higher of the
management agent software.
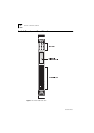
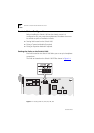
2
Connect a terminal to the serial port located on the MSH front panel.
You can find instructions for doing this in the
LinkBuilder MSH
Management Module User Guide
, part number DUA1850-0AAA0x.
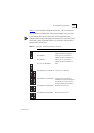
3
Press [Return] one or more times until the MSH Main Banner appears.
The serial port will detect the terminal line speed (baud rate) and
default to:
■
8 data bits
■
1 stop bit
■
no parity
You cannot modify these settings. If your terminal is already setup with
these values, the MSH Main Banner will appear as soon as power-up is
complete. Press [Return] to display the MSH Main Menu.
4
At the MSH Main Menu, select SERVICE SELECTION. From the Service
Selection list, select Switch 1005. From the Address Table screen,
choose the required Switch 1005 and
select MANAGE. The Switch Main
Banner
screen
appears.