


2-8 CHAPTER 2: INSTALLING THE HUB
To install and connect a GBIC module, follow these steps:
1 Disconnect all power to the Hub 1000 SX.
Disconnect the AC power cord. If you are using an Advanced RPS unit,
disconnect the RPS cable from the DC power connector.
2 Remove the GBIC module from its shipping container.
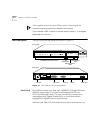
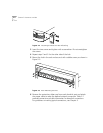
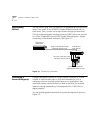
3 Slowly insert the module into the rear-panel uplink port, being careful not
to damage any of the components or connecting pins.
The module slides into the hub following the tracks in the slot. The
lettering that shows the module type must be positioned on top of the
connector openings when the module is in place.
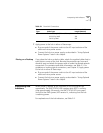
4 Push the module all the way in until the connector makes contact.
5 Reattach the power cord and any power system cable to the hub.
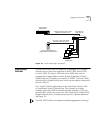
6 Attach the proper cable to the module to make the desired
network connection.
Both ends of the connection must be of the same media type (CX, LX,
or SX).
7 Reconnect power to the hub.
Using Optional
Power Systems
You can ensure fail-safe operation and constant power to SuperStack II
components by using the SuperStack II Advanced Redundant
Power System (Advanced RPS) and the SuperStack II Uninterruptible
Power System (UPS). These units and associated Power Modules and
cabling must be purchased separately.
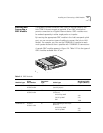
Advanced RPS A single SuperStack II Advanced RPS (part numbers 3C16070 and
3C16071) can protect up to four SuperStack II Hub 1000 SX units from
internal power supply failures. If a SuperStack II unit’s internal power fails,
the Advanced RPS is capable of supplying all the unit’s power needs.
The Advanced RPS chassis is rack-mountable. It is fed by two independent
AC lines and remains operational if one of the AC lines fails. The front panel
provides LED indicators for monitoring temperature as well as power input
and output status.