


A-8 APPENDIX A: USING THE CONSOLE PORT
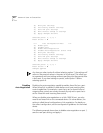
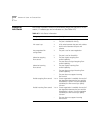
(5) Show port settings
(6) Use factory default settings
(7) Save new port settings
(8) Exit without change to settings
(9) Apply changes and exit
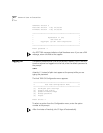
Selected ports: 3, 5, 6, 7
Enter choice -> 2
**** Port Configuration Menu ****
(1) Enable port
(2) Disable port
(3) Enable Auto-Negotiation
(4) Disable Auto-Negotiation (Force link)
(5) Show port settings
(6) Use factory default settings
(7) Save new port settings
(8) Exit without change to settings
(9) Apply changes and exit
Selected ports: 3, 5, 6, 7
Enter choice -> 9
Changes applied
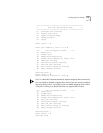
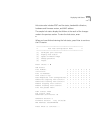
Any time you select option 9 without selecting option 7, the settings will
return to the previous values in the event of a hub reset. This allows you
to experiment with port settings without specifying that they persist after
a hub reset. If you want settings to persist, select option 7 before
selecting option 9.
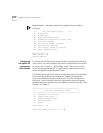
Disabling
Auto-Negotiation
Disabling the auto-negotiation capability enables forced link on a port.
When forced link is enabled, linked devices must have matching flow
control capabilities. For example, a port that is set for forced link and
outgoing flow control can connect successfully only with a port that is
set for forced link and incoming flow control.
When you disable auto-negotiation on a Hub 1000 SX port, you also
need to set forced link on the connected device. On some devices, this
setting is called forced configuration or link negotiation. For details on
the correct configuration, see the configuration guidelines for the linked
device.
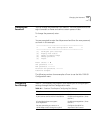
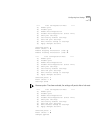
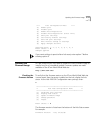
The following example shows how to disable auto-negotiation on port 1,
save the new port setting, and apply it.