


3 Hardware configuration
108
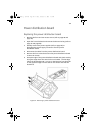
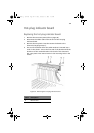
5 Place the end of the new hot-plug indicator board into the
notched bracket in the back of the electronics bay.
6 Align the plastic rivet sleeves in the chassis back panel with the
two mounting holes in the board and press the sleeves into the
holes.
7 Insert the two plastic rivets into the mating sleeves and snap the
rivets down to secure the board to the electronics bay.
8 Connect the ribbon cable to the mating connector on the hot-plug
indicator board.
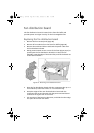
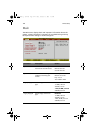
B Rivet sleeve
CRivet
Label Description
BB!H:11!vh!.!FO/cppl!!Qbhf!219!!Gsjebz-!Kbovbsz!28-!3114!!8;24!QN