


27
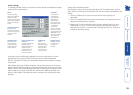
Access mode - shared/private
Up to ve users can be simultaneously logged-on (four remote users plus one
local user) and during normal operation, all are able to see the same view of
the currently selected host. If you need to perform a sensitive task that should
not be viewed by other users, you can change the access mode to Private. This
action blanks the viewer window for all other logged on users.
Note: For the courtesy of other users, this mode should be used sparingly. The
admin user has the ability to overrule the private setting.
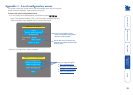
To change the access mode
1 Click one of the arrow buttons adjacent to the
Shared/Private indicator.
Power control
When congured (and where you have access rights) this option allows you to
control the mains power input to the currently selected host computer.
Note: This option is generally used to power cycle remote systems that have
failed to respond. Before switching a system off, ensure that all attempts have
rst been made to power it down through normal means.
To switch a system on or off
1 Use the Hosts button to select the required computer.
2 Click the Power button and then select the Switch on
or Switch off option, as appropriate.
Auto calibrate
When you visit a host computer for the very rst time, your viewer needs to
determine the optimum video and mouse settings for that particular computer.
The button will remind you to click by ashing red when it encounters a
new computer screen. Performing this step is important because it can help
to decrease unnecessary video information being sent across the link, thus
improving overall performance.
Once this has been done, providing you use the ‘Hosts’ button to switch
between host computers, the video settings for each machine will be re-used.
Note: When performing an auto calibration, ensure that the screen image
is static (no moving images) and also that there are no on-screen displays
generated by KVM switches (such as host names or menus). This is because they
may confuse the calculation and can result in a lower overall performance level.
For the mouse calibration part, ensure that there are no application windows
located around the upper left corner of the screen. This is because as the mouse
calibration takes place, the cursor may change (to match the application as it
skims across the window) and this may confuse the calculation. Also ensure that
the host system does not have the mouse cursor trails option enabled.
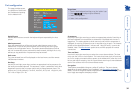
To auto calibrate the screen and mouse
1 Use the Hosts button to select the required computer.
2 Click the button and then click OK in the subsequent pop-up message.
The screen will appear to freeze for approximately 10 to 60 seconds as
the necessary calculations are made. Operation will return as soon as the
calculations are complete.
Re-synchronise mouse
If you nd that your local mouse pointer and that of the host are not correctly
synchronised, use this feature to re-align their movements. This operation is also
selectable from the Controls menu.
To re-synchronise the mouse
1 Use the Hosts button to select the required computer.
2 Click the button and then click OK in the subsequent pop-up message.