


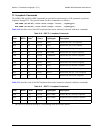
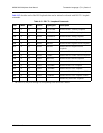


A-4 61200290L1-1G
Appendix A, Acceptance Test Procedure MX2800 M13 Multiplexer User Manual
• DS2 #6 = M12(4xT1)
•
DS2 #7 = M12(4xT1)
NOTE
For additional information about the previous configuration, refer to
Network Interface on page 3-4.
2. Press the
ESC key to get back to the main Configuration menu.
Provisioning the DS1 Ports
1. From the main Configuration menu, select T1/E1 Interface. The Configure T1/E1 Interface menu
should appear. Since there are 28 DS1 ports to configure and all of them need to be set identically dur-
ing acceptance testing, the Set Multiple provisioning feature of the MX2800 is used during this step.
To use the
Set Multiple feature, select the attribute from the Configure T1/E1 Interface screen. From the
Set Multiple screen, confirm that First = 1 and Last = 28. If not, make the necessary corrections. Select
State to toggle the State as necessary until the correct setting is displayed, and select Apply settings to
set all 28 DS1s to that mode. Press
ESC twice to return to the Configure T1/E1 Interface menu.
2. Select
T1/E1 State. If all channels are set to Auto Enable (default), press ESC to get back to the
Configure T1/E1 Interface menu and proceed to the next step. If not, perform the Set Multiple routine
referenced above.
3. Select
T1/E1 Line Coding. If all channels are set to B8ZS (default), press ESC to get back to the
Configure T1/E1 Interface menu and proceed to the next step. If not, perform the Set Multiple routine
accordingly.
4. Select
T1/E1 Line length. If all channels are set correctly (0-133, 133-266, 266-399, 399-533 or 533-
655
feet) as appropriate for the installation, proceed to the next step. If not, perform the Set Multiple
routine accordingly.
5. Select
T1/E1Loopback Detection.
6. Select
Set Multiple. Set First to 1, Last to 28, Loopback Detection to Disabled. Select Apply Settings.
7. Press
ESC twice to return to the Configure T1/E1 Interface menu.
8. Select
T1/Circuit Protection.
9. Select
Set Multiple. Set First to 1 and Last to 28. Set Circuit Protection to Enabled. Select Apply
Settings
.
10. Press
ESC once and select Protection Threshold. Enter a value of 1 and press ESC once to return to the
Configure T1/E1 Interface
menu.
11. Select
XCV Threshold. Select Disabled.
12. Press the
Esc key to get back to the main Configuration menu.