


Section 4: Using the AXIS 700 AXIS 700 User’s Manual
56
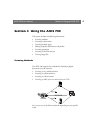
Scanning to Destinations
Note:
o
Before scanning to an e-mail address or a file, the Administrator
must have set up the destinations as described in “Specifying
Destinations” on page 40.
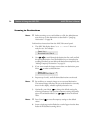
Perform these instructions from the AXIS 700 control panel:
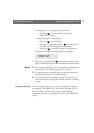
1. The AXIS 700 display shows “
Send to: xxxxxx” when it is
ready for use. For example:
2. Use to scroll through the destination list, until you find
the desired destination. Press and hold the key to autorepeat the
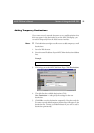
scrolling. If needed, you can add e-mail destinations temporarily. See
“Adding Temporary Destinations ”on page 59.
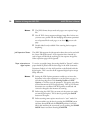
3. If you want to send the image to more than one destination, press
Enter to select each destination:
4. Repeat steps 2 and 3, until all desired destinations are selected.
Note:
o
Be careful not to transmit images to an unwanted destination.
The scanned image will always be sent to the destination currently
shown in the display, whether explicitly selected or not.
5. Optionally, press Menu to change the default settings for
scanning parameters. You can select temporary settings for profile,
paper size and double-sided. Use to select the desired
value.
Note: o Press Cancel to reset all temporary settings to the default
values.
6. Insert a single page on the flatbed or a stack of paper into the sheet
feeder of the attached scanning device.
6HQGWR
$FFRXQWLQJ 'HSW
6HQGWR ✓
$FFRXQWLQJ 'HSW