


65
Ch. 3 Functions
Functions
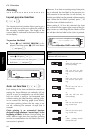
2 Hold down d and press S.
3 Rotate r (OR press m or g) until the
desired setting is displayed.
4 Press r (OR press n). If ON was
selected, print resolution is automatically
adjusted for stamps.
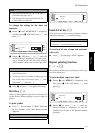
5 Press p to cut the text out of the stamp
stencil film.
6 After the stamp stencil film is cut off,
remove the backing paper from the stamp
stencil film and affix it to the ink pad of a
stamp film holder. Refer to Assembling
stamps on page 37.
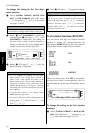
Auto format function (
d
+
6
)
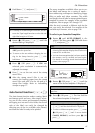
The Auto format function makes creating labels
and stamps quick and easy. After simply select-
ing one of the various pre-formatted templates
and typing text into each of its fields, the overall
style of the label can easily be changed by
selecting one of the six available style formats,
and then the label is ready to be printed.
The many templates available allow you to cre-
ate labels and stamps for a variety of needs—
from addressing envelopes to identifying floppy
disks or audio and video cassettes. The width
and length of each label or stamp printed from a
template is preset. For samples of the available
templates, refer to pages 105 through 107.
After the text is entered, a different style for the
text can easily be selected. For samples of the
available style formats, refer to page 108.
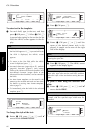
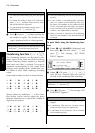
To select a pre-formatted template:
1 Rotate r until AUTO FORMAT is dis-
played, and then press r (OR hold down
d and press 6).
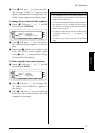
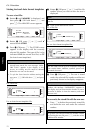
2 Rotate r (OR press m or g) until the
name of the desired template is displayed.
3 Press r (OR press n). The first field for
the selected template is displayed.
NOTE
☞
If a stamp is created using this function, be sure
to use the Tape length function to select left and
right label margins of 25 mm.
NOTE
☞
To return the function to its default setting
(OFF), press the space bar.
☞
To return to the text without changing the set-
ting for the Stamp function, press e (OR
hold down d and press S).
NO
Length Margin Font Width Size
1
2
3
4
5
6
7
8
9
A
B
C
D
E
F
K
Q
Q
Q
Q
Q
Q
Q
Q
Q
Q
Q
Q
Q
Q
Q
Q
Q
Q
Q
Q
Q
Q
Q
Q
R
R
R
R
R
R
G
H
I
J
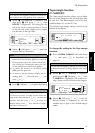
AUTO 0.4 HELSINKI A AUTO
STAMP MODE
OFF
L
M
NOTE
☞
The template that was last used appears first.
Selecting this template displays the text that was
entered in it at that time.
☞
An Auto format template that has been stored in
the memory can be recalled and used again.
For details on recalling stored Auto format tem-
plates, refer to page 73.
NOTE
To select the default setting (ADDRESS-1), press the
space bar.
NOTE
☞
To select a different field, rotate r (OR press
m or g) until the desired field is displayed.
☞
To select a different template, press e, rotate
r (OR press m or g) until
!
moves beside
CANCEL EDITING?, and then press r (OR
press n).
Length Margin Font Width Size
1
2
3
4
5
6
7
8
9
A
B
C
D
E
F
K
Q
Q
Q
Q
Q
Q
Q
Q
Q
Q
Q
Q
Q
Q
Q
Q
Q
Q
Q
Q
Q
Q
Q
Q
R
R
R
R
R
R
G
H
I
J
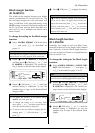
8.0 0.4 HELSINKI A AUTO
1:
ADDRESS-1
24× 80mm
L
M