


6-20
Using the Fax Functions
Register Unit Name
Your name or company’s name must be registered as the
machine’s name.
When you send a document, the name that you registered
will appear at the top of the recipient’s paper.
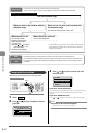
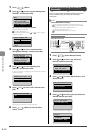
How to display the settings
[ ] (Menu) <Fax TX Settings> <Basic Settings>
<Register Unit Name>
Settings
You can enter characters (up to 24 characters).
“Text Input Method” (P.1-9)
NOTE
How to use a username
When you send a document, the sender information that you
registered is printed on the recipient’s paper.
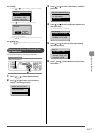
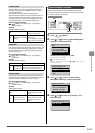
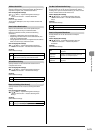
Sending Date/Time
Fax/Telephone Number
(FAX No.)
Page Number
Sender Name
(Unit Name)
Telephone Number
Mark
01/01/2011 02:07 PM FAX 123XXXXXXX CANON P.0001
Register Unit Telephone Number
Register your machine’s fax number.
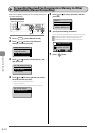
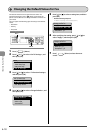
How to display the settings
[ ] (Menu) <Fax TX Settings> <Basic Settings>
<Register Unit Telephone Number>
Settings
You can enter numbers with the numeric keys (up to 20
characters).
Select Line Type
If you cannot send a fax, change this setting.
If you are not sure about your telephone line type, contact
your local telephone company.
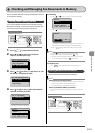
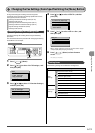
How to display the settings
[ ] (Menu) <Fax TX Settings> <Basic Settings>
<Select Line Type>
Settings
(Bold: Default settings)
Dial 10 PPS Specify when you are using a dial-line.
Tone Specify when you are using a tone-line.
Public Line Connection
The following problems may occur when fax receive mode
is selected to <Fax/Tel Auto Switch>.
• The external telephone does not ring.
• Cannot make a call using the external telephone.
You can solve these problems by changing this setting.
How to display the settings
[ ] (Menu) <Fax TX Settings> <Basic Settings>
<Public Line Connection>
Settings
(Bold: Default settings)
Direct Use this setting under normal conditions
Adapter 1
Select this option if a problem occurs when
<Direct> is selected.
Adapter 2
Select this option if the problem continues
when <Adapter 1> is selected.
Off-Hook Alarm
Specify whether or not to sound an alarm when the
telephone handset is off the hook.
You can also set the volume of the alarm sound.
How to display the settings
[ ] (Menu) <Fax TX Settings> <Basic
Settings> <Select Line Type>
Settings
(Bold: Default settings)
Off No alarm will sound.
On
Off-Hook Alarm Volume:
1 to 5
An alarm will sound at the
specified volume.
Sender ID
You can specify whether the sender ID is added to a
document to be sent.
The sender ID is printed on the top of the sent document.
Information such as your fax number and name is printed,
enabling the recipient to know who sent the document.
How to display the settings
[ ] (Menu) <Fax TX Settings> <Basic
Settings> <Sender ID>
Settings
(Bold: Default settings)
Off No sender ID is added.
On
Print Location:
On Image, Above Image
Select the location where the
sender ID is printed.
Mark No. as TEL/FAX:
FAX, TEL
Select a character to be added
in front of a telephone number.
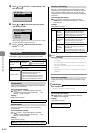
Change Defaults
You can change the settings for when turning the power
ON or pressing [
] (Reset).
How to display the settings
[ ] (Menu) <Fax TX Settings> <TX Function
Settings> <Change Defaults>
Settings
For details on the settings, see the following item.
“Changing the Default Values for Fax” (P.6-18)
ECM TX
The ECM (Error Correction Mode) is a function for detecting
and correcting errors during fax communication. Using
the ECM function can diminish send errors even over poor
connections
NOTE
Check the settings for the recipient’s machine also.
The ECM function is available only when the setting for the
machine and recipient’s machine are enabled.
Even if the ECM function is enabled
An error may occur due to the telephone line.
When the ECM function is enabled
It may take additional time to send documents if a problem occurs
with the telephone line.