


6-24
Using the Fax Functions
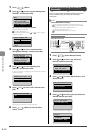
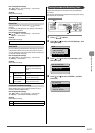
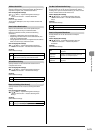
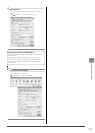
5 Press [ ] or [ ] to select <TX Start Speed>, and
then press [OK].
Fax Settings
TX Start Speed
RX Start Speed
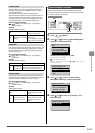
6 Press [ ] or [ ] to select the send start speed,
and then press [OK].
TX Start Speed
33600 bps
14400 bps
9600 bps
7200 bps
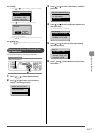
* When <Apply> appears in the screen, you must select <Apply>
and press [OK] after specifying the setting.
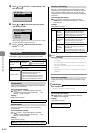
7 Press [ ] (Menu) to close the menu
screen.
The setting is complete.
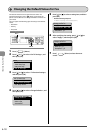
Setting Items
The following system management settings are available.
System Settings
Communications
Settings
Fax Settings
“TX Start Speed” (P.6-24)
“RX Start Speed” (P.6-24)
“Memory Lock Settings” (P. 6-24)
“Select Country/Region” (P.6-24)
Restrict Sending
“Address Book PIN” (P.6-25)
“Restrict New Destinations” (P.6-25)
“Allow Driver Faxing” (P.6-25)
“Restrict Sending From History” (P.6-25)
“Fax No. Confirmation Re-Entry” (P.6-25)
“Restrict Sequential Broadcast” (P.6-25)
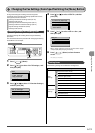
TX Start Speed
Change the transmission start speed if you have difficulty
starting a fax transmission.
How to display the settings
[ ] (Menu) <System Management Settings>
<Communication Management Settings> <Fax
Settings> <TX Start Speed>
Settings
(Bold: Default settings)
33600 bps, 14400 bps, 9600 bps, 7200 bps, 4800 bps, 2400 bps
RX Start Speed
Specify the receive start speed if you have difficulty
receiving faxes.
How to display the settings
[ ] (Menu) <System Management Settings>
<Communication Management Settings> <Fax
Settings> <RX Start Speed>
Settings
(Bold: Default settings)
33600 bps, 14400 bps, 9600 bps, 7200 bps, 4800 bps, 2400 bps
Memory Lock Settings
Normally, received documents are immediately printed.
However, you can specify whether or not to store received
faxes in memory before printing. You can then print the
stored faxes at any time or delete them without printing to
save paper.
How to display the settings
[ ] (Menu) <System Management Settings>
<Communication Management Settings> <Memory
Lock Settings>
Settings
(Bold: Default settings)
Off Does not use the Memory Lock mode.
On
Memory
Lock PIN:
Seven-digit
number
If you set a PIN, it will be necessary to
enter the PIN whenever you want to
change the Memory Lock mode settings,
or cancel the Memory Lock mode.
Print Report:
Off, On
You can specify whether or not to print
the receive results when receiving a fax.
To use this feature, you must also
activate the “Receive Results” feature.
Memory
Lock Time:
Off, On
If you specify <On>, documents are
received in the memory only within a
specified time.
Enter <Memory Lock Start Time> and
<Memory Lock End Time> respectively.
NOTE
Memory Lock PIN
• If you do not want to set the PIN, press [OK] without entering
any numbers.
• You cannot register consecutive digits that consist of only “0” as a
PIN, such as <0000000>.
• If you register a number that starts from <0>, the PIN changes
as follows.
Example: When you enter <02> or <002>, the PIN is specified as
<0000002>.
Select Country/Region
Specify the country or region where the machine is to be
used.
IMPORTANT
After configuration
Restart the machine to activate the settings.
How to display the settings
[ ] (Menu) <System Management Settings>
<Select Country/Region>
Settings
(Bold: Default settings)
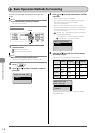
UnitedStates (US), Canada (CA),
Brazil (BR), Mexico (MX), Other