3-13
SmartBase MPC200/imageCLASS MPC200
Chapter 3: Assembly and Disassembly
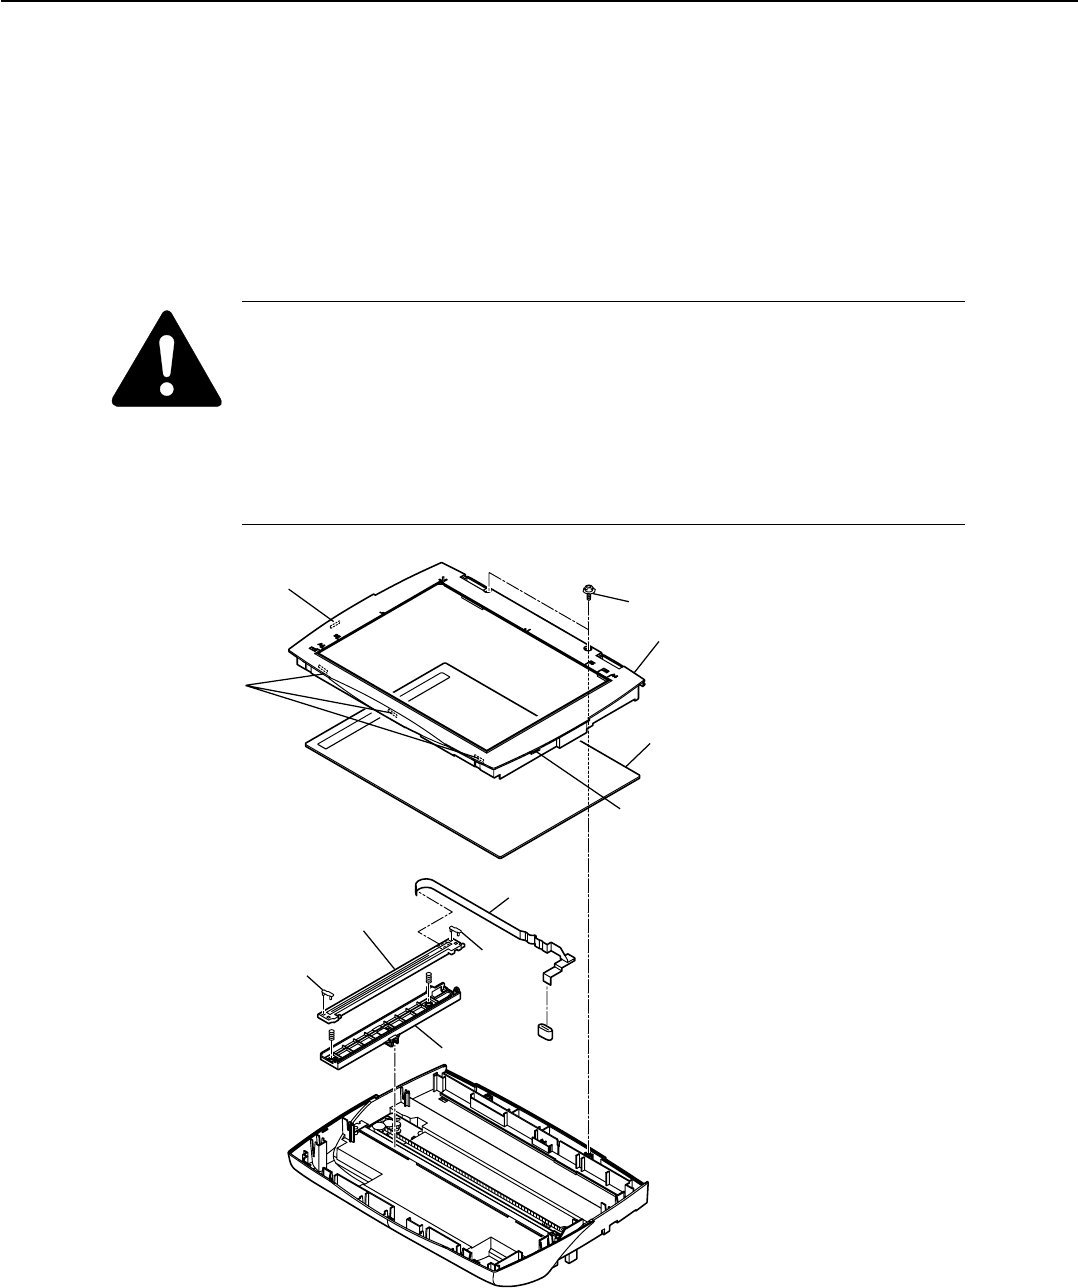
Figure 3-8 Disassembly 8
Disassembly 8. Contact sensor
(1) Perform disassembly 1, and detach the flat bed ass’y.
(2) Remove the 2 screws (a).
(3) Free the 5 claws (b), and detach the scanner cover. At this time, take care not to drop the document
glass.
(4) Remove the spacer from the contact sensor.
(5) Disconnect the cable (c), and detach the contact sensor from the contact sensor holder.
Handling the contact sensor
Be careful not to scratch or soil the glass surface of the contact sensor. Any such
scratches or dirty marks may lead to image defects, such as vertical streaks, etc., on the
scanned image.
Caution when replacing the contact sensor
When replacing the contact sensor, the CS LED light-on duration needs to be adjusted.
Refer to Chapter 4, 3.1 CS LED Lights-on Duration Adjustment, for details.
Spacer
Spacer
c
Document glass
Scanner cover
Contact seneor holder
a
b
b
b
Contact sensor
Download Free Service Manual And Resetter Printer at http://printer1.blogspot.com


