


Installing the Chassis 3-7
Tools for Installation
Tools for Installation
You need the following tools and equipment to install the chassis:
• Number 1 and number 2 Phillips screwdrivers to tighten the captive installation screws
on most systems
• A 3/16-inch flat-blade screwdriver for the captive installation screws on the route
processor and line modules
• An antistatic mat or antistatic foam if you need to remove modules to troubleshoot the
installation
• Your own ESD grounding strap or the disposable ESD strap included with the system
If you are installing the chassis in a rack, you also need the following:
• A rack-mount kit
• A tape measure and a level
Rack-Mounting the Chassis
To install the chassis in a rack, follow these steps:
Warning To prevent the chassis from overheating, do not operate it in an area
that exceeds the maximum recommended ambient temperature of 104°F (40°C).
To prevent airflow restriction, allow at least 3 inches (7.6 cm) of clearance around
the ventilation openings.
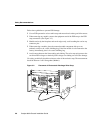
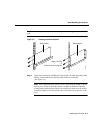
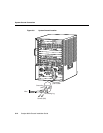
Step 1 Prepare for installation as follows:
(a) Remove the rubber feet from the chassis, if needed, to ensure a better fit in
the rack. Place the chassis face down on a flat surface. Remove the screw
that holds each foot.
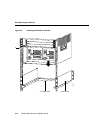
(b) Place the chassis on the floor or on a sturdy table as close as possible to the
rack. Leave enough clearance so that you can move around the chassis.