


Maintaining the Chassis 4-13
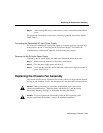
Removing and Installing DC-Input Power Supplies
Installing the DC-Input Power Supply
To install a DC-input power supply, follow these steps:
Step 1 Verify that power is off to the DC-input circuit.
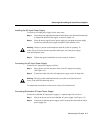
Warning Before connecting or disconnecting ground or power wires to the
chassis, ensure that power is removed from the DC circuit. To ensure that all
power is OFF, locate the circuit breaker on the panel board that services the DC
circuit, switch the circuit breaker to the OFF position, and tape the switch handle
of the circuit breaker in the OFF position.
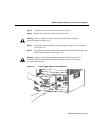
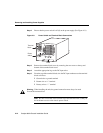
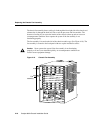
Step 2 Grasp the power supply handle with one hand and place your other hand
underneath to support the bottom of the supply, as shown in Figure 4-8.
Step 3 Place the DC-input power supply into the power supply bay and push the
DC-input power supply into the bay until the power supply faceplate is flush
with the cover.
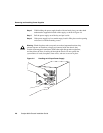
Warning Voltage is present on the backplane when the system is operating. To
reduce risk of an electric shock, keep hands and fingers out of the power supply
bays and backplane areas.
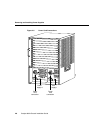
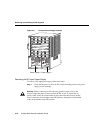
Step 4 Tighten the captive installation screw by turning it clockwise. (See Figure 4-7)
Connecting the DC-Input Power Supply
To connect the DC-input power supply to the input voltage source, follow these steps:
Step 1 Verify that power is off to the input circuit.
Warning Before performing any of the following procedures, ensure that power
is removed from the DC circuit. To ensure that all power is OFF, locate the circuit
breaker on the panel board that services the DC circuit, switch the circuit breaker
to the OFF position, and tape the switch handle of the circuit breaker in the OFF
position.