Getting Started
Using the Access Point Setup Wizard
Cisco Small Business WAP551 and WAP561 Wireless-N Access Point 8
1
STEP 16 For the WAP561 device, the Network Name, Wireless Security, and VLAN ID
pages show to enable configuring Radio 2. When finished with configuring Radio
2, click Next.
The Wizard displays the Enable Captive Portal - Create Your Guest Network
window.
STEP 17 Select whether or not to set up an authentication method for guests on your
network, and click Next.
If you click No, skip to STEP 25.
If you click Yes, the Wizard displays the Enable Captive Portal - Name Your Guest
Network window.
STEP 18 Specify a Guest Network Name for Radio 1. For the WAP561 device, select
whether the guest network uses Radio 1 or Radio 2.
STEP 19 Click Next. The Wizard displays the Enable Captive Portal - Secure Your Guest
Network window.
STEP 20 Choose a security encryption type for the guest network and enter a security key.
For a description of these options, see System Security.
STEP 21 Click Next. The Wizard displays the Enable Captive Portal - Assign the VLAN ID
window.
STEP 22 Specify a VLAN ID for the guest network. The guest network VLAN ID should be
different from the management VLAN ID.
STEP 23 Click Next. The Wizard displays the Enable Captive Portal - Enable Redirect URL
window.
STEP 24 Select Enable Redirect URL and specify a fully qualified domain name or IP
address in the Redirect URL field (including http://). If specified, guest network
users are redirected to the specified URL after authenticating.
STEP 25 Click Next. The Wizard displays the Summary - Confirm Your Settings window.
STEP 26 Review the settings that you configured. Click Back to reconfigure one or more
settings. If you click Cancel, all settings are returned to the previous or default
values.
STEP 27 If they are correct, click Submit. Your WAP setup settings are saved and a
confirmation window appears.
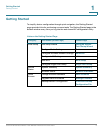
STEP 28 Click Finish. The Getting Started window appears.


