


Back to Contents Page
Drives
DellPrecision™WorkStation340ServiceManual
Removing and Installing a Floppy Drive—Small Desktop Computer
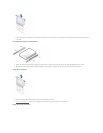
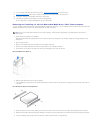
1. Unpack the drive and prepare it for installation.
Check the documentation that accompanied the drive to verify that the drive is configured for your computer. Change any settings necessary for your
configuration.
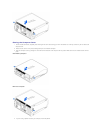
2. Open the computer cover.
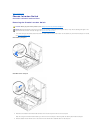
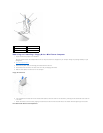
3. If you are replacing a drive that is already installed in the bay, disconnect the power and floppy-drive cables from the back of the drive before you
remove the drive and bracket assembly.
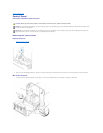
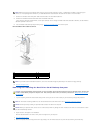
Floppy-Drive Cable Removal
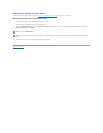
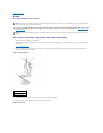
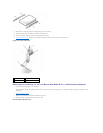
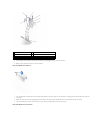
4. Press inward on the two tabs on the sides of the drive bay to disengage the bracket.
5. Slide the bracket upward, and remove it from the inside of the computer.
Floppy-Drive Removal
NOTE: Cable ends are color coded so that black identifies the floppy-disk drive cable, yellow the front I/O panel cable, orange the secondary IDE cable,
white the SCSI cable, and blue the primary IDE cable.
CAUTION: Toavoidthepossibilityofelectricshock,turnoffthecomputerandanydevices,disconnectthemfromtheirelectricaloutlets,andthen
wait at least 5 seconds before you open the computer cover. Also, before you install a drive, see the other precautions in "Safety First—For You
and Your Computer."
NOTICE: To avoid possibly damaging the drive by electrostatic discharge, ground yourself by touching an unpainted metal surface on the back of the
computer.
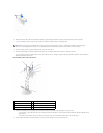
1
power cable
2
floppy-drive cable
3
floppy-drive connector