


Removing and Installing a Floppy Drive—Mini-Tower Computer
1. Unpack the drive and prepare it for installation.
Check the documentation that accompanied the drive to verify that the drive is configured for your computer. Change any settings necessary for your
configuration.
2. Open the computer cover.
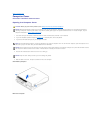
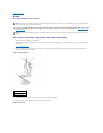
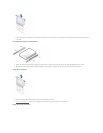
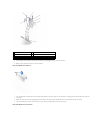
3. Disconnect the power cable and the floppy-drive data cable from the drive.
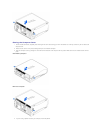
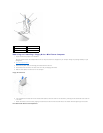
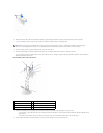
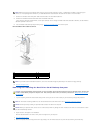
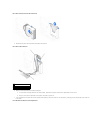
4. Press inward on the two tabs on the sides of the drive bay to disengage the bracket.
5. Slide the drive upward, and remove it from the computer.
Floppy-Drive Removal
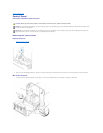
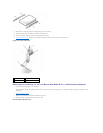
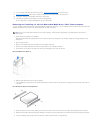
6. If the replacement drive does not have the bracket rails attached, remove the rails from the old drive by removing the two screws that secure each rail
to the drive.
7. Attach the bracket to the new drive by aligning the screw holes on the drive with the screw holes on the bracket rails and tightening all four screws.
Drive Rail Bracket Removal and Replacement
1
power cable
4
floppy-drive connector
2
floppy cable
5
power connector
3
floppy-cable connector