


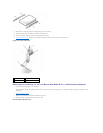
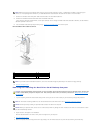

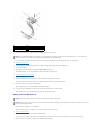


5. Press in on the tabs on each side of the bracket, and slide it up and out.
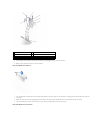
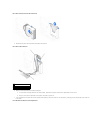
6. If the replacement drive does not have the bracket rails attached, remove the rails from the old drive by removing the two screws that secure each rail
to the drive.
7. If necessary, attach the bracket rails to the new hard drive by aligning the four screw holes of the drive and bracket and then inserting and tightening
the screws that came with your upgrade kit.
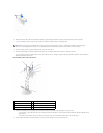
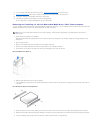
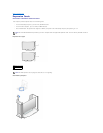
8. Reinstall the hard-drive bracket by gently sliding the bracket into place until you hear it securely click.
Hard-Drive Replacement
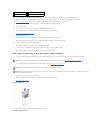
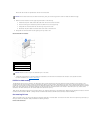
9. Connect a power cable to the power cable connector on the back of the drive, and connect the hard-drive data cable to the hard-drive data cable
connector on the drive.
Hard-Drive Cable Attachment
1
hard-drive data cable
2
power cable
3
hard-drive connector (IDE PRI)
NOTICE: To avoid possibly damaging the drive by ESD, ground yourself by touching an unpainted metal surface on the back of the computer.
NOTICE: When you unpack the drive, do not set it on a hard surface, which may damage the drive. Instead, set the drive on a surface, such as a foam
pad, that will sufficiently cushion it.