


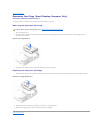

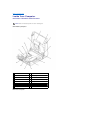
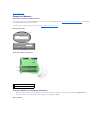
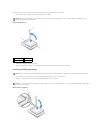

1. Disconnect the control-panel cable from the control-panel connector on the I/O panel.
2. Disconnect the front I/O cable from the front-panel connector on the system board (see "System Board Components" for the location of the front-panel
connector).
Note the routing of the control panel cable as you remove it from the computer so that you can replace it correctly.
3. Remove all cables that are connected to the front I/O panel.
4. From inside the computer cover, remove the mounting screw that secures the front I/O panel to the computer.
5. Rotate the front I/O panel towards the hard drive and remove the front I/O panel from the computer.
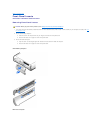
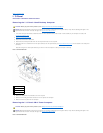
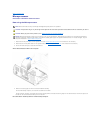
Replacing the I/O Panel
To replace the front I/O panel, follow the removal procedure for your computer in reverse.
Back to Contents Page
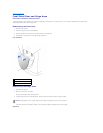
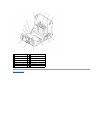
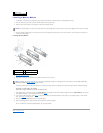
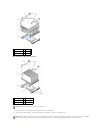
1
control-panel cable
2
front audio cable
3
front I/O cable
4
mounting screw