


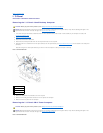
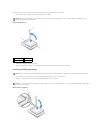

3. Carefully set the microprocessor in the socket and press it down lightly to seat it.
4. Rotate the lever toward the socket until it snaps into place, securing the microprocessor package.
5. If you are installing a new heat sink, remove the film covering the bottom of the heat sink.
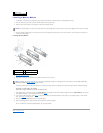
6. On the small desktop computer, reinstall the two screws that attach the blower to the heat sink.
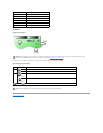
7. Lower the heat sink or blower/heat sink assembly to the microprocessor so that the heat sink fits in the retention base.
8. Fit the end of each securing clip that does not have the latch over its tab on the retention base. Then, fit the middle of the clip over the middle tab on
the retention base, and press down on the clip's latch to secure the clip to the retention base.
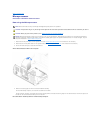
9. On the mini-tower computer, lower the airflow shroud over the heat sink.
10. Plug the cooling fan power cable into its connector on the system board.
11. Plug the 12-volt power cable into its connector on the system board.
12. Close the computer cover, reconnect your computer and devices to their electrical outlets, and turn them on.
Checking Computer Functions
As the computer boots, it detects the presence of the new microprocessor and automatically changes the computer configuration information in system setup.
1. Enter system setup and confirm that the system data area correctly identifies the type of installed microprocessor.
For instructions on using system setup, see your User's Guide.
2. While in system setup, reset the Chassis Intrusion option by pressing the left- or right-arrow key to select Reset and then choosing Enabled, Enabled-
Silent, or Disabled.
3. Run the Dell Diagnostics to verify that the new processor is operating correctly.
Back to Contents Page
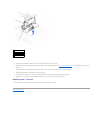
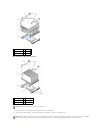
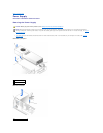
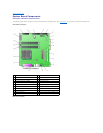
1
pin-1 corners of microprocessor and the socket
NOTICE: The microprocessor pins are delicate. To avoid damage, ensure that the microprocessor aligns properly with the socket, and do not use
excessive force when installing the processor.
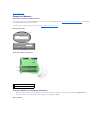
NOTICE: If you are not installing a microprocessor kit from Dell, reuse the original heat sink and securing clips when replacing the microprocessor.
NOTE: After you open and close the cover, the chassis intrusion detector causes the following message to be displayed at the next computer start-up:
ALERT! Cover was previously removed.Reset the chassis intrusion detector.
NOTE: If a setup password has been assigned by someone else, contact the network administrator for information on resetting the chassis intrusion
detector.