


Back to Contents Page
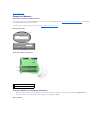
Microprocessor
DellPrecision™WorkStation340ServiceManual
Removing the Microprocessor
1. Disconnect the fan power cable from the system board (see "System Board Components" for the location of the connector).
2. Disconnect the 12-volt power cable from the system board (see "System Board Components" for the location of the connector).
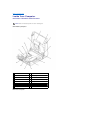
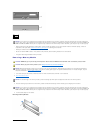
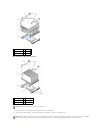
3. On the mini-tower computer, rotate the airflow shroud.
Airflow Shroud Rotation—Mini-Tower Computer
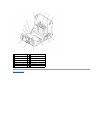
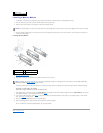
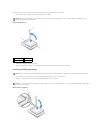
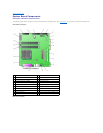
4. Remove the securing clips to remove the heat sink/blower assembly.
On the small desktop computer, the heat sink is attached to the blower.
On the mini-tower computer, press down on the metal securing latches to release the securing clips from the retention base. Then lift the clips out of
the tabs on the retention base and away from the heat sink.
Heat Sink/Blower Assembly Removal—Small Desktop Computer
NOTE: Dell recommends that only a technically knowledgeable person perform this procedure.
CAUTION: The processor can get very hot during normal operation. Be sure that the processor has had sufficient time to cool before you touch it.
CAUTION: Before you perform this procedure, see "Safety First—For You and Your Computer."
NOTICE: Before disconnecting a device from the computer, wait 10 to 20 seconds after disconnecting the computer from its electrical outlet. Before
removing a component from the system board, verify that the standby power light on the system board has turned off. To locate this light, see your
computer's illustration in "System Board Components."