Setting Up and Using Your Computer 41
Enabling the Infrared Sensor
1 Enter the system setup program:
a Turn on your computer.
b Press when the Dell™ logo appears.
HINT: You cannot use the
infrared sensor when the
computer is docked.
2 Press until you locate Infrared Data Port under Basic
Device Configuration.
3 Press the down-arrow key to highlight Disabled next to Infrared Data
Port.
4 Press the right-arrow key to change the setting to a COM port.
Ensure that the COM port that you select is different from the COM
port assigned to the serial connector.
5 Press the down-arrow key to select Infrared Mode, and press the right-
arrow key to change the setting to Fast IR or Slow IR.
Dell recommends that you use Fast IR. If the infrared device cannot
communicate with your computer, turn off the computer and repeat
steps 1 through 5 to change the setting to Slow IR.
6 Press to save the changes and exit the system setup program.
If you are prompted to restart your computer, click Yes.
7 Follow the instructions on the screen while the infrared sensor driver is
being installed.
8 At the end of the installation process, click Yes to restart the computer.
HINT: If the infrared
device cannot
communicate with your
computer after you repeat
steps 1 through 5 to
change the system setup
program setting to Slow
IR, refer to the
documentation that came
with the device or contact
the infrared device
manufacturer.
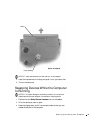
After you enable the infrared sensor, you can use it to establish a link to an
infrared device. To set up and use an infrared device, see the infrared device
documentation and the Windows XP Help and Support Center (to access
help, see page 56).


