


122 Adding and Replacing Parts
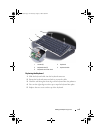
Replacing Mini-Card
NOTICE: The connectors are keyed to ensure correct insertion. If you feel resistance,
check the connectors on the card and on the system board, and realign the card.
NOTICE: To avoid damage to the Mini-card, never place cables under the card.
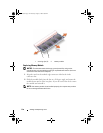
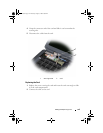
1
Insert the card connector into the system board connector at a 45-degree angle.
2
Press the other end of the card down into the slot on the system board
until the card clicks into place.
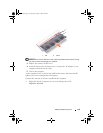
3
Replace the securing screw.
4
Connect the cables to the Mini-Card, ensuring that you route the cables
correctly.
NOTE: For more specific information about which cable to connect to which
connector, see the documentation that came with your Mini-Card.
5
Secure unused antenna cables in the protective mylar sleeve.
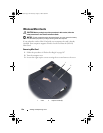
6
Replace the cover and tighten the eight captive screws.
Internal Card With Bluetooth
®
Wireless
Technology
CAUTION: Before you begin any of the procedures in this section, follow the
safety instructions in the Product Information Guide.
NOTICE: To avoid electrostatic discharge, ground yourself by using a wrist
grounding strap or by periodically touching an unpainted metal surface (such as a
connector on the back of the computer).
NOTICE: To help prevent damage to the system board, you must remove the battery
from the battery bay before you begin working inside the computer.
If you ordered a card with Bluetooth wireless technology with your computer,
it is already installed.
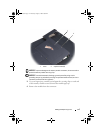
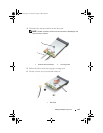
Removing the Card
1
Follow the procedures in "Before You Begin" on page 107.
2
Remove the hinge cover (see "Hinge Cover" on page 113).
3
Remove the screw securing the card.
book.book Page 122 Thursday, August 7, 2008 5:00 PM