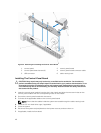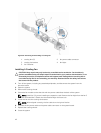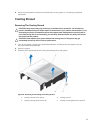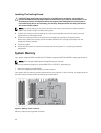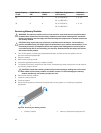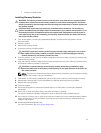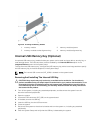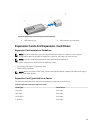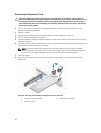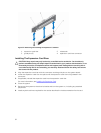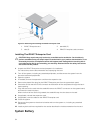
3. memory-module socket
Installing Memory Modules
WARNING: The memory modules are hot to the touch for some time after the system has been
powered down. Allow time for the memory modules to cool before handling them. Handle the
memory modules by the card edges and avoid touching the components or metallic contacts on
the memory module.
CAUTION: Many repairs may only be done by a certified service technician. You should only
perform troubleshooting and simple repairs as authorized in your product documentation, or as
directed by the online or telephone service and support team. Damage due to servicing that is
not authorized by Dell is not covered by your warranty. Read and follow the safety instructions
that came with the product.
1. Turn off the system, including any attached peripherals, and disconnect the system from the
electrical outlet.
2. Open the system.
3. Remove the cooling shroud.
4. Locate the memory-module sockets.
CAUTION: Handle each memory module only by the card edges, making sure not to touch
the middle of the memory module or metallic contacts. To avoid damaging the memory
module, handle only one memory module at a time.
5. Press the ejectors on the memory module socket down and out to allow the memory module to be
inserted into the socket.
6. Align the memory-module's edge connector with the alignment key of the memory-module socket,
and insert the memory module in the socket.
CAUTION: To prevent damage to the memory-module socket during installation, apply
pressure at both ends of the memory module evenly. Do not apply pressure to the center of
the memory module.
NOTE: The memory-module socket has an alignment key that allows you to install the memory
module in the socket in only one orientation.
7. Press down on the memory module with your thumbs until the memory module snaps into place.
8. Repeat step 4 through step 7 of this procedure to install the remaining memory modules.
9. Replace the cooling shroud.
10. Close the system.
11. Reconnect the system to the electrical outlet and turn on the system, including any attached
peripherals.
12. Press <F2> to enter the System Setup, and check the memory settings.
The system should have already changed the value to reflect the newly installed memory.
13. If the value is incorrect, one or more of the memory modules may not be installed properly. Repeat
step 4 through step 7 of this procedure, checking to ensure that the memory modules are firmly
seated in their sockets.
14. Run the appropriate diagnostic test.
For more information, see Using System Diagnostics.
47


