3. Disconnect the power cable from the power supply and remove the straps that bundle and secure
the system cables.
4. Open the system.
5. Disconnect all the power cables from the power supply to the system board, hard drives, and optical
drive.
6. If applicable, remove the 2.5 inch/3.5 inch hard-drive cage to remove the cables secured by the wire
routing latch.
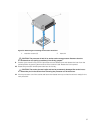
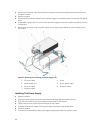
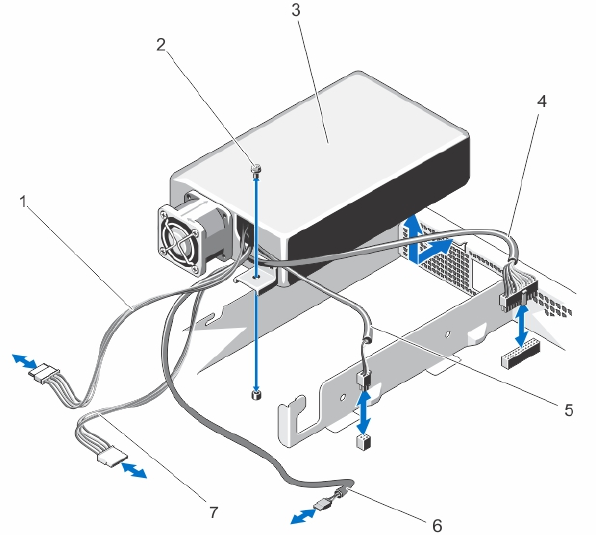
7. Remove the screw securing the power supply to the chassis, slide and lift the power supply out of
the chassis.
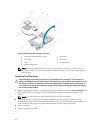
Figure 27. Removing and Installing the Power Supply Unit
1. P3 power cable 2. screw
3. power supply unit 4. 24-pin power cable
5. P2 power cable 6. P5 power cable
7. P4 power cable
Installing The Power Supply
1. Open the system.
2. Orient the power supply so that the connector fits through the back-panel opening.
3. Align the screw hole on the power supply with the hole on the chassis.
4. Tighten the screw to secure the power supply to the chassis.
5. Connect all the power cables to the system board, hard drives, and optical drive.
6. Close the system.
7. Connect the power cable to the power supply and plug the cable into a power outlet.
60


