


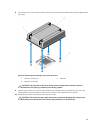
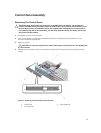

3. Press the release latch and pull the power supply straight out to release it from the power distribution
board and clear the chassis.
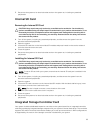
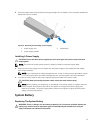
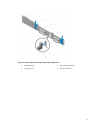
Figure 31. Removing and Installing a Power Supply
1. power supply unit 2. release latch
3. power supply handle
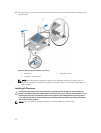
Installing A Power Supply
CAUTION: Ensure that both power supplies are of the same type and have the same maximum
output power.
NOTE: The maximum output power (shown in Watts) is listed on the power supply label.
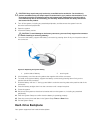
1. Slide the new power supply into the chassis until the power supply is fully seated and the release
latch snaps into place.
NOTE: If you unlatched the cable management arm in step 2 of the previous procedure, relatch
it. For information about the cable management arm, see the system’s rack documentation.
2. Connect the power cable to the power supply and plug the cable into a power outlet.
CAUTION: When connecting the power cable, secure the cable with the strap.
NOTE: When installing, hot-swapping, or hot-adding a new power supply in a system with two
power supplies, allow several seconds for the system to recognize the power supply and
determine its status. The power-supply status indicator turns green to signify that the power
supply is functioning properly.
System Battery
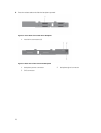
Replacing The System Battery
WARNING: There is a danger of a new battery exploding if it is incorrectly installed. Replace the
battery only with the same or equivalent type recommended by the manufacturer. See your
safety information for additional information.
73