apter 4: We
on
gurat
on
31
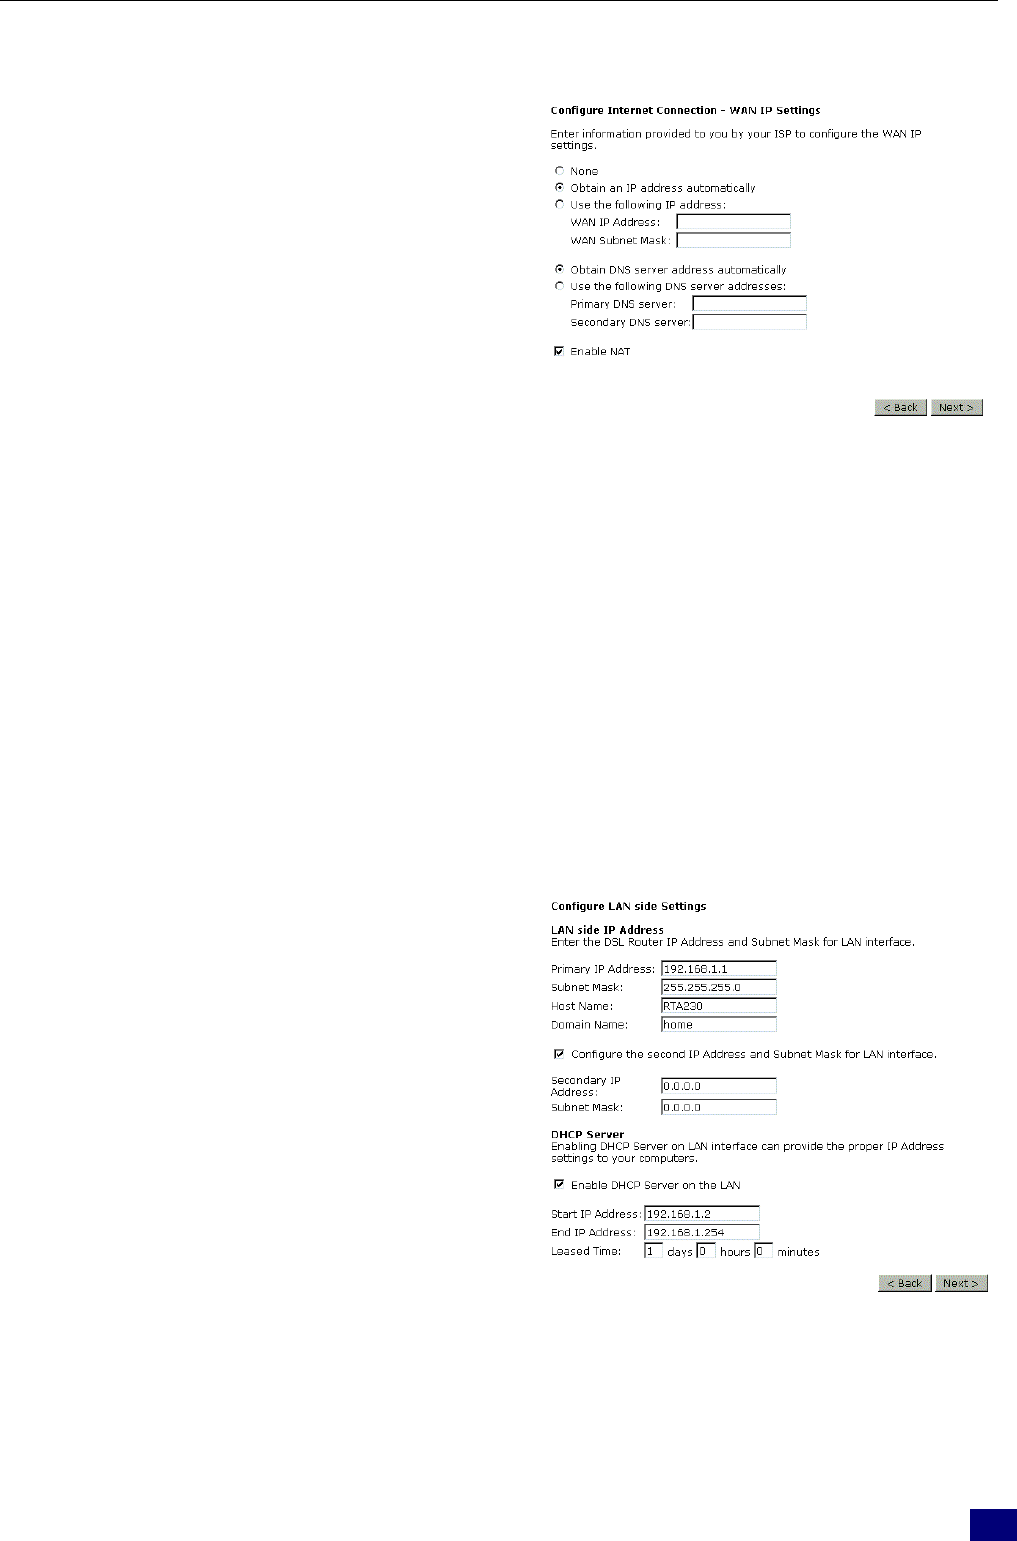
None:
If it is not necessary to set the WAN IP
address, please click this button.
Obtain an IP address automatically: Click
this button to make the system get an IP
address automatically.
WAN IP Address:
Type in the IP address that you got from ISP
for the WAN interface.
WAN Subnet Mask:
Type in the subnet mask address that you got
from ISP for the WAN interface.
Obtain DNS server address automatically:
Click this button to make the system get
DNS server automatically.
Use the following DNS server address:
If you want to set DNS server by yourself,
you have to click on this button to invoke the
following entries.
Preferred DNS server:
Type in your preferred DNS server that you
got from ISP.
Alternate DNS server:
Type in the alternate DNS server that you
got from ISP.
Enable NAT:
Check Enable NAT to enable this function.
Please type in the WAN IP address, Subnet Mask and DNS server addresses. Then Click
Next to get the following page.
Primary IP Address:
Type in the first IP address that you got from
your ISP for your LAN connection.
Subnet Mask:
Type in the subnet mask that you got from
your ISP for your LAN connection.
Configure the second IP Address and
Subnet Mask for LAN interface:
Check this box to make another set of IP
Address and Subnet Mask to connect to your
router if they are not included in the range
that DHCP server accepts.
Secondary IP Address:
Type in the second IP address that you got
from your ISP for your LAN connection.
Subnet Mask:
Type in the subnet mask that you got from
your ISP for your LAN connection.
Enable DHCP server on the LAN:
Check this item if DHCP service is needed
on the LAN. The router will assign IP
address, gateway address for each of your
On the Configure LAN side Settings web page, the IP
address and subnet mask will be shown on it. You can
modify them if needed. Click Next for next page.
