


AD
S
L Router User Manua
l
68
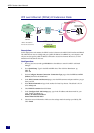
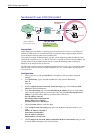
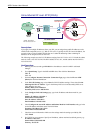
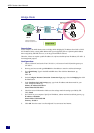
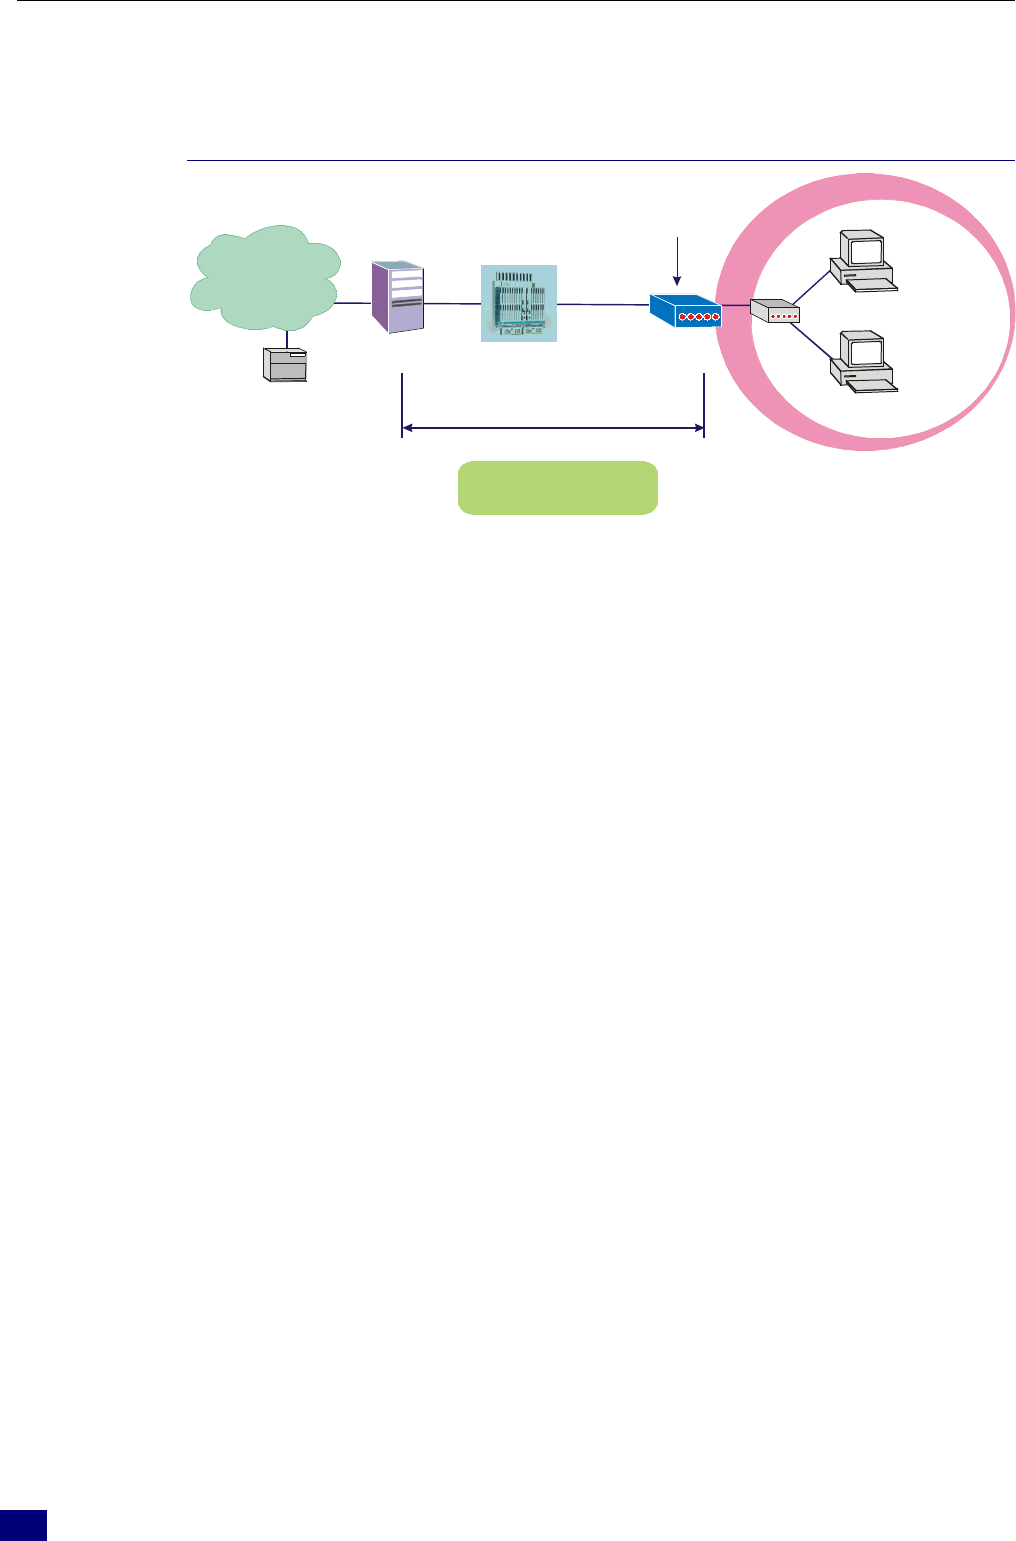
Unnumbered IP over ATM (IPoA)+NAT
RDAIUS
Server
AAA
BRAS
STM-1
DSLAM
Loop
Public IP Pre-assigned
by ISP+NAT
Hub
ADSL
Router
PC(S)
IP over ATM
S/W
Default Private IP
192.168.1.1
*BRAS: Broadband
Remote Access Server
ISP
(Internet Service Provider)
10.3.75.49
10.3.75.51
10.3.75.50
Description:
In this deployment environment, we make up a private IP network of 192.168.1.1. NAT function is
enabled (on ADSL Router or use another NAT box connected to hub) to support multiple clients to
access the Router and some public servers (WWW, FTP).
If you apply for multiple IP addresses from your ISP, you can assign these public IP addresses to the
ADSL Router and public server, e.g., Web or FTP server. Typically the first IP is network address, the
second is used as router IP address and the last one is subnet broadcasting. Other remaining IP
addresses can be assigned to PCs on the LAN.
The following example uses the LAN IP address ranging from 10.3.75.49 to 10.3.75.54 and the subnet
mask for LAN is 255.255.255.248. The WAN address is 10.3.70.1, and the subnet mask for WAN is
255.255.255.252.
Configuration:
1. Start up your browser and type 192.168.1.1 as the address to enter this ADSL web-based
manager.
2. Go to Quick Setup. Type in the VCI and VPI value. Then click the Next button.
VPI – 0
VCI – 32
3. On the Configure Internet Connection -Connection Type page, select the IP over ATM
(IPoA) then click the Next button.
4. In the WAN IP Settings page, select None for WAN IP address settings. Then, select Use the
following DNS Server Address. Type in the Primary DNS server and Secondary DNS server.
Click Next for next page.
Primary DNS server: 168.95.1.1
Secondary DNS server: 168.95.192.1
5. Check the Enable NAT box. And click Next.
6. In the Configure LAN side Settings page, type in the IP address and subnet mask for your
LAN.
Primary IP Address: 192.168.1.1
Subnet mask: 255.255.255.0
Start IP Address: 192.168.1.2
End IP Address: 192.168.1.254
7. Check Configure the second IP Address and Subnet Mask for LAN Interface and type in the
second IP address and subnet mask. Then click Next.
Secondary IP Address: 10.3.75.49
Subnet mask: 255.255.255.248