Setup: LAN Setup Page 21
device. The LAN IP address is changed through the web interface. If you have a
computer on your LAN that is using Windows 95 or later, you can also use the Diva
Assistant.
Diva Assistant
The Diva Assistant (for Windows 95 or later) can detect the
Diva 2430 over a LAN and can change the LAN IP address for
you, without having to change your own IP address settings.
Follow these steps:
1.
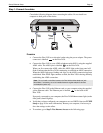
Connect the Diva 2430 to your LAN using a straight-through
cable (sold separately).
2.
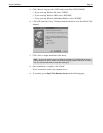
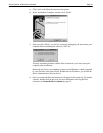
Install the Diva Assistant (see
Optional: Install the Diva
Assistant
on page 18).
3.
Restart your computer.
4.
Right-click on the Diva Assistant icon that appears in the
system tray.
5.
Select ‘Network Wizard’ and follow the onscreen
instructions.
Web Interface
For all computers, you can also use the web interface to change
the LAN IP setting.
1.
Temporarily change the TCP/IP settings on your computer
so that it is set to the IP address 192.168.l.2.
2.
Access the web interface (see
Starting the Web-based
Configuration Interface
on page 41).
3.
Click ‘System Settings’.
4.
Enter a new IP address in the ‘LAN IP Address’ field.
5.
Click ‘Save’.
Note:
Once you click ‘Save’, you will lose contact with the
device. This is normal.
6.
Return your TCP/IP settings back to the way their original
state.
7.
To re-access the web interface, click ‘File’, ‘Open’ in your
web browser, then enter the new IP address.
Your computer must be on the same subnet as the Diva 2430 in
order to communicate through TCP/IP. For example, if the new
device IP address is 192.100.1.1, your computer must be set to
192.100.1.x, with x being any number from two to 255.
However, if your computer is set to acquire its IP address
dynamically from a DHCP server, you need only restart your
computer (or reset the IP address manually using ‘winipcfg’
with Windows 9x or ‘ipconfig/renew’ for Windows 2000/NT).
The Diva 2430 will assign the new address.


