


26 Paper Handling
Note:
Remove any remaining slack by gently pulling the paper from the
rear or bottom.
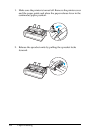
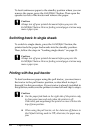
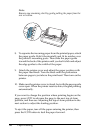
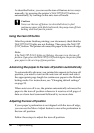
8. To separate the incoming paper from the printed paper, attach
the paper guide. Hold it horizontally and fit its notches over
the printer’s mounting posts. Then slide the paper guide
toward the back of the printer until you feel it click and adjust
the edge guides to the width of the paper.
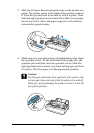
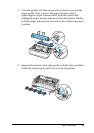
9. Attach the printer cover and adjust the paper position with
the paper feed knob. Turn the knob until the perforation
between pages is just above the print head. Then turn on the
printer.
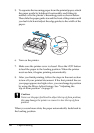
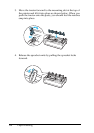
10. Make sure the printer cover is closed, but with the paper guide
cover open. When the printer receives data, it begins printing
automatically.
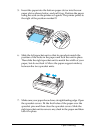
If you want to change the position where printing begins on the
page, press LF/FF to advance the page to the next top-of-form
position, and then see Adjusting the top-of-form position in the
next section to adjust the loading position.
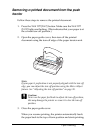
To eject the paper, tear off the paper entering the printer; then
press the LF/FF button to feed the paper forward.