


EPSON Stylus C63/64/83/84 Revision A
Disassembly and Assembly Disassembly 29
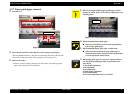
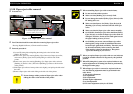
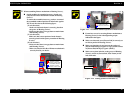
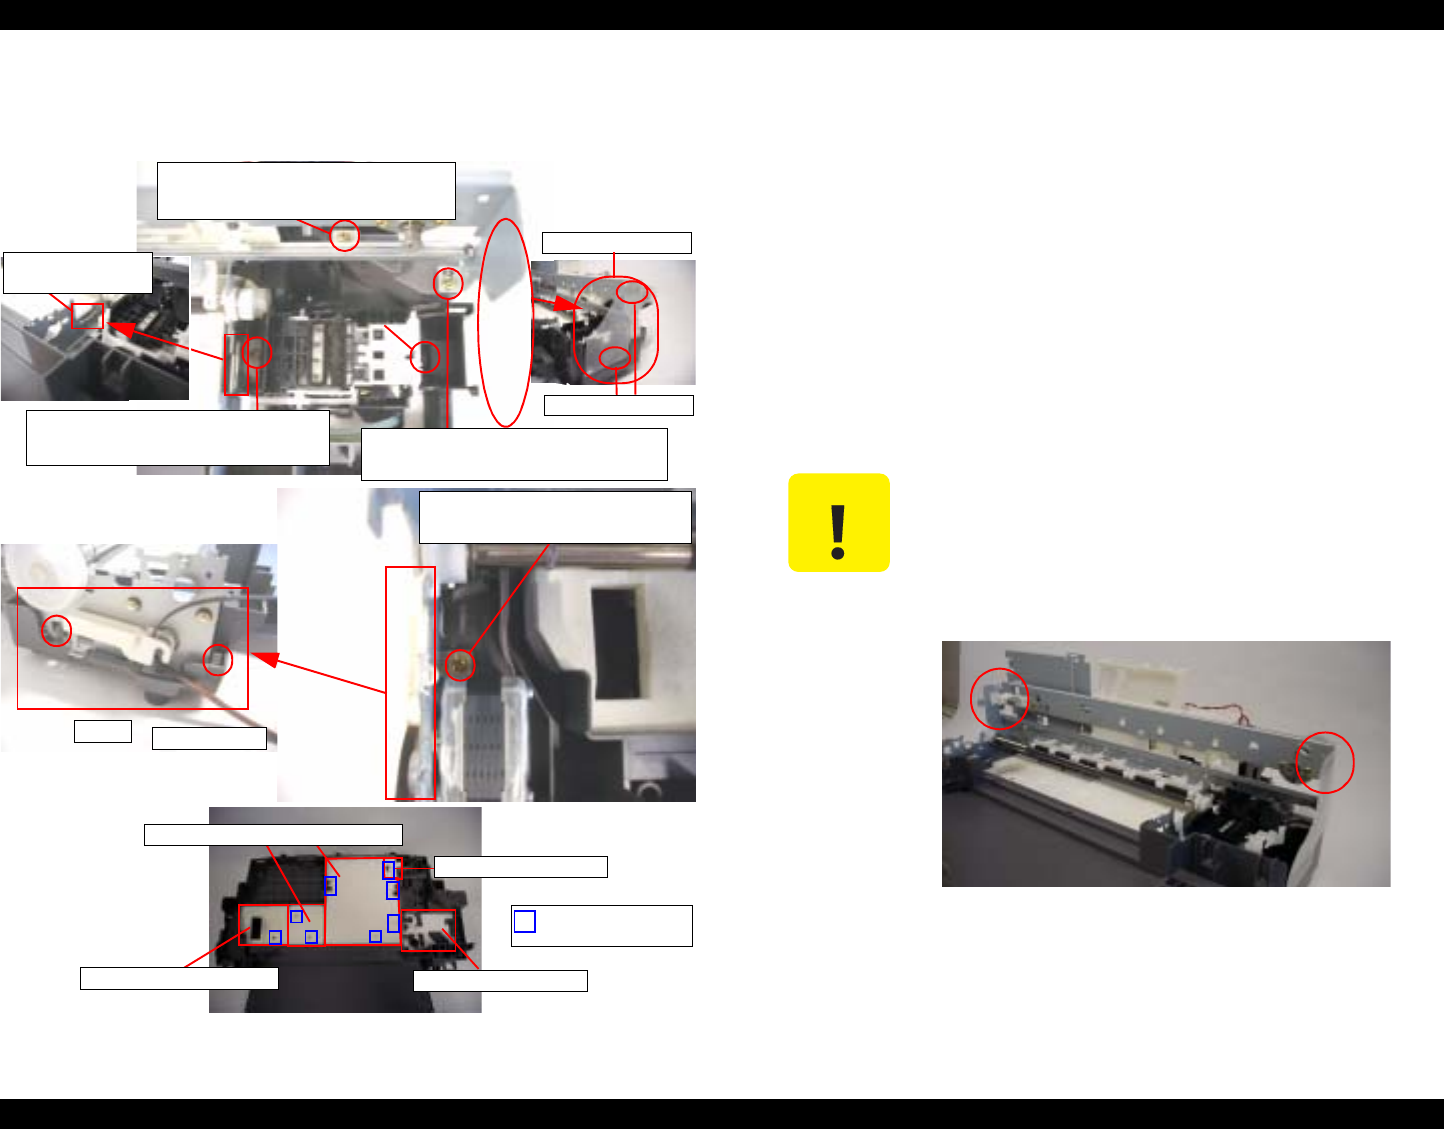
1.3.12 Printer mechanism/Housing (Lower) removal
o External view
Figure 1-18.
o
Part/Unit that should be removed before removing Printer mechanism/
Housing (Lower)
Housing (Right/Left/Frame) / ASF unit / Circuit board / PS board / CR unit with
Front frame / Paper eject roller / Paper guide front
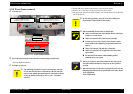
o Removal procedure
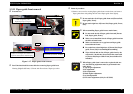
1) Peel off [Sheet, Protect, Splash] from Cap unit.
2) Remove four screws for securing Printer mechanism to Housing (Lower).
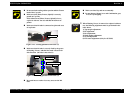
3) Release one hook for securing Cap unit by the tweezer, and insert the
protrusion of Cap unit to temporary [Cap unit] setting portion.
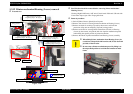
4) Release two hooks for securing Printer mechanism (left side) to Housing
(Lower) by the tweezer, and pull the left side of printer mechanism upward
with holding the specific position of printer mechanism.
5) Remove the whole of printer mechanism from Housing (Lower) carefully.
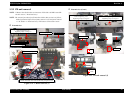
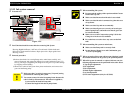
Screw type : C.B.P-TITE SCREW, 3x8, F/Zn
Order of tightening : Second
Thghtening torque : 6
±
1 kgf.cm
Screw type : C.B.P-TITE SCREW, 3x8, F/Zn
Order of tightening : Third
Thghtening torque : 6
±
1 kgf.cm
Hook
Sheet, Protect, Splash
Screw type : SCREW, FRAME MAIN
Order of tightening : Non
Thghtening torque : 6
±
1 kgf.cm
PF timing belt
Double side tape
Porous Pad, Ink Eject, Lower/Upper
Porous Pad, Ink Eject, F/B
Porous Pad, Cap Lower
Porous Pad, Tube Fasten
Rib/cut-out portion of
Housing (Lower)
Screw type : C.B.P-TITE SCREW, 3x8, F/Zn
Order of tightening : First
Thghtening torque : 6
±
1 kgf.cm
Temporary [Cap uni]
setting position
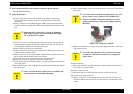
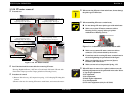
C A U T I O N
o When lifting Printer mechanism from Housing (lower), be
careful not to drip off the ink from the end (Waste drain ink
pad side) of the ink tube.
o Do not remove Printer mechanism upward by lifting it at
the unspecified position to avoid the deformation of main
frame.
Figure 1-19. Holding position of Printer machanism