


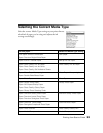

Maintaining Your Printer 41
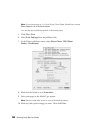
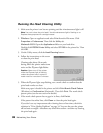
3. Use the printer software to check the ink levels and see which cartridge you need
to replace:
Windows: From an application, open the printer software and check the ink
levels on the Main tab. (See page 20 for instructions on opening the software.)
You can also check the ink levels by pressing Start > Settings > Printers and
Faxes
(or Start > Control Panel > Printers and Faxes). Right-click the
Stylus Photo 1280 and select Printing Preferences.
Macintosh OS X: Choose Applications > EPSON Printer Utility > SP 1280.
Click OK, then click EPSON StatusMonitor.
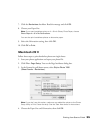
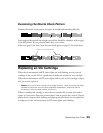
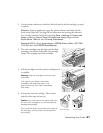
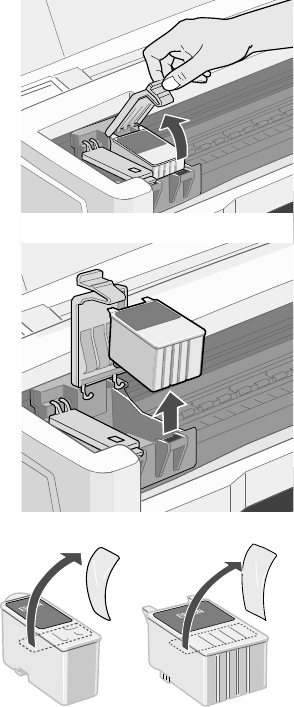
4. The color cartridge is on the right and the black
cartridge is on the left. Pull up the ink cartridge
clamp. The cartridge rises from its holder.
5. Lift the cartridge out of the printer and dispose of
it carefully.
Warning: Keep ink cartridges out of the reach
of children.
If ink gets on your hands, wash them
thoroughly with soap and water. If ink
gets in your eyes, flush them immediately
with water.
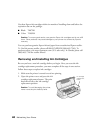
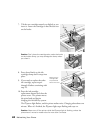
6. Unwrap the new ink cartridge. Then remove
only the yellow tape seal on top.
Caution: You must remove the yellow seal from
the top of the cartridge or you will permanently
damage the cartridge.
Don’t touch the green circuit board on the back of
the cartridge; you may inhibit normal operation
and printing.
Black cartridge Color cartridge